Sunday, August 19, 2012

More Veggies PLEASE!!!

I am a fan of veggies.  I prefer them cooked over raw but for some reason when I go to the kitchen for something to eat.... I don't choose veggies.  Those cookies and chocolate bars always just jump in my mouth.  I was excited to try this recipe because when I do make veggies its either roasted with salt and pepper or boiled/stemmed.  I don't mind that flavor but my kids including Symon feel that they need to add butter, ranch, or mayo to make the veggies taste better.  This recipe takes a side of veggies to a whole other flavor and makes veggies exciting.  This could be done with any left over veggies.  It calls for 2 carrots and 1 medium size zucchini.  

I started by cutting the veggies into matchstick size.  
While heating up a saute pan (or large frying pan if you don't have a fancy one yet like me) I placed oil (canola) in it then added minced garlic and ginger.
After about 1-2 minutes I placed the carrots in.  Make sure you pay attention because garlic burns super easily and it tastes nasty!
After 5-7 minutes and added the zucchini.


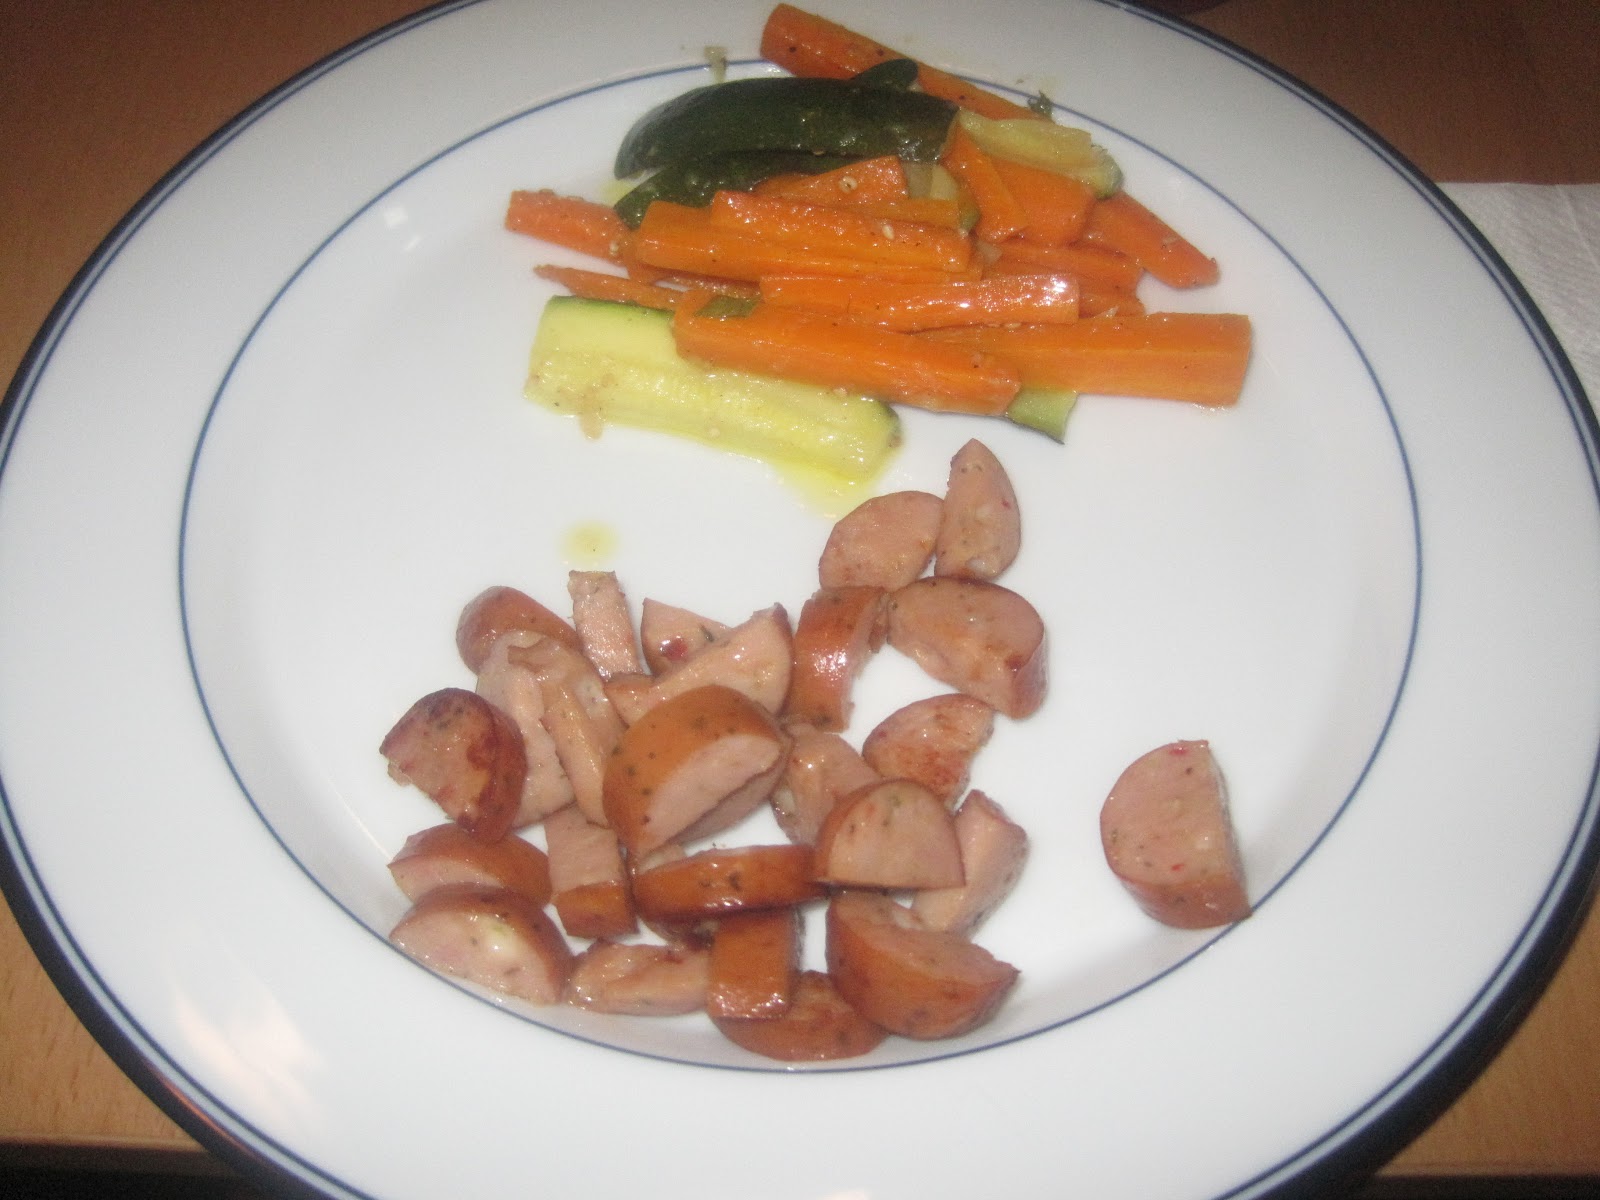
After the zucchini was added I placed the lid on the pan because the carrots were still too firm for my liking.  After all the veggies were soft I sprinkled it with salt, pepper, mint, toasted sesame seeds, and a splash of rice wine vinegar and then removed from the heat.
I served it with some chicken sausage. I thought the veggies turned out nice but I little bit on the oily side.   I attribute this to not using a large enough pan.  Because I used a small bottom pan, the veggies were sitting in the oil and not evenly spread out.
I really enjoyed this recipe because it reminded me that veggies can be exciting.  Don't just steam them with salt and pepper.  Get creative and look in your pantry for fun things to spice them up.  Parsley or rosemary could be substituted for mint.  There are also a lot of different kinds of vinegar that could be interchanged.  Play with your veggies to make them fun and hopefully you and your kids can start to enjoy them more.  Who knows, they might even jump into your mouth instead of that cookie! 

Thursday, August 16, 2012

Fried chicken? Healthy version

Fried chicken is a staple in America.  The famous white bearded man made the "quick" version even more famous.  People eat fried chicken with biscuits and gravy and even sometimes with waffles (which I still think is weird).  To me chicken is more of a healthy protein and therefore should not be fried.  I was interested is finding chicken in the "frying" application in this cookbook but glad it was under the saute' section.  I was hoping it would be a healthier version.  Come to find out it was better than any fried chicken I ever had.  This chicken is called, "Chicken in Garlic and Shallots".  Is your mouth watering yet?  I know mine was.  The protein calls for either 1 whole chicken cut into 8 pieces or 10 chicken thighs.  I was not able to try to disassemble a bird so I went with the chicken thighs.  Here you can see them.  (yes I know there is 9) 

First up of course was to salt and pepper the thighs and remember chicken needs lots of salt to make sure it stays moist.  (Sorry blood pressure)

2 Tablespoons of canola oil into a hot pan and then the chicken thighs into the oil.  I find that this is kind of like creating a sear on the chicken but moreover to create a crispy skin.  Is anything better than crispy chicken skin?  Come on,  I know you all have taken a piece of turkey skin on Thanksgiving right... right?  No?  Only me?  Ok then.....
Look at that pretty golden brown color!!!!
After the chicken skin is crispy and golden brown I then removed the chicken and placed it into a ovenproof pot.  It would be nice if I had a ovenproof skillet with a top but Santa hasn't gone to Sur La Table' lately!  HINT HINT!!!!  After the chicken was put into the pot.  I poured the left over oil and then added garlic, shallots and herbs.  The herbs I used was parsley, thyme and rosemary.  You could also substitute sage but Fry's grocery store was out of course.
I then covered my pot and into to oven at 350 degrees for 1 1/2 hours.  I know that was a long time for chicken but it was so worth it.  It smelt AMAZING!!!  Even though it was 115 degrees outside and then I had the oven running for  that long the house was even hotter the smell was worth it!  I served it with a biscuit and salad.  This picture does not do the chicken justice.  It was sooooo good.
The chicken was really moist, full of flavor with the herbs and so easy.  The best part was that I was able to use all of the left over chicken and made Chicken Broccoli the next day.  It was one of the best chicken broccoli I have made in a long time.  
I really loved this recipe because not only did it make a yummy chicken dinner which was a nice change to the boring chicken breast that we all eat so much.  The other nice thing was that it could be made with 1-100 pieces of chicken depending on the size you desire.  I was able to use 10 thighs and make 3-4 different dinners and lunches throughout the week from chicken burritos to chicken salad sandwiches.  
How do you prefer your chicken, fried, broiled, boiled, or sauted.  I choose saute'.  It seems like the best of all.

Thursday, August 9, 2012

Potato chips... Homemade style

My family loves chips.  Any kind including tortilla, potato, veggie and even pitas are a huge hit here.  Since I have become more aware of what we have been eating, chips are rarely in our house and if they are I can guarantee I was not the one who bought them.  (The kids love when Symon brings some chips home)  I'm not going to lie,  I LOVE CHIPS!!  My problem is two fold,  
#1  I love salt and can't stop eating them once I start
 #2  I eat them straight out of the bag
Therefore I was excited that I HAD to make chips.  :)  I started by getting set up with my frying station.  On the left is my draining rig, middle is oil, and the right is ice water in a salad spinner.  


I took one large russet potato and used a veggie peeler to make strips.  I placed the strips immediately into the ice water bath.  After I had 15 strips, I drained the water and then ran them through the salad spinner.

Once the oil was hot to 350 degrees in goes the potato strips
I gently used a spider (as seen next to the fryer) to pull apart the strips that are sticking together.  After about 1-2 minutes I removed them and placed them on the draining rig.  :)  Don't forget salt and pepper.  Yummy.
One potato filled up a Tupperware with chips and they were gone within 24 hours.  And by the way, I only had about 5 chips thanks to Ryan and Symon.  (Reagan was not a fan at all)  She is such a werido.  :)


These chips tasted really amazing.  Fresh and not heavy at all.  I felt like even though they were fried, it didn't have all of the chemicals that commercial companies use to keep their chips fresh while sitting on a shelf.  After making this I would love to try it again with different kinds of seasoning right after you take them out of the oil.  Maybe chili powder or lime juice/ zest.  The possibilities are endless.   I encourage you to try these and try a different spice.  I know I will.  

This is the end of the section about deep frying and next up saute'.  :)  A healthier way to cook finally. 

Saturday, July 28, 2012

Here Fishy!!!

Calamari Crunch

As most of you know, I grew up in California near the beach where I grew up eating fish.  Clam chowder, trout, salmon, but almost everyone I know starts off with calamari.  My great grandfather came from Sicily to fish in Monterey years ago, so maybe thats why I like fish, but it is always something scary to make.  Now that I live in Arizona, there is a major lack of fish.... well at least fresh fish here.  So of course I had to wait until our trip to California to make this recipe.  Just to remind you, we are still in the "Frying" applications and surprisingly I have not gained a pound.  :)  To start this application I needed 1/2 lb of calamari.  I went to a couple of grocery stores in Salinas but nobody had calamari.   I was very surprised.  Off the to fish market.  When I got home I found two calamari "steaks" in my package.  I was so grateful.  I was not ready to to remove a head and ink sac in order to cook this fish.  As you can see there are little "bumps" on the fish.  After discussing this with mom and dad, my sou chefs, (and hearing stories about Aunt Rosie and the pounding of the calamari) we determined that it had already been pounded.  The pounding is suppose to tenderize the fish.  I also want to point out that nowhere in the recipe does it discuss pounding so I did not do as such. Here are my fish "steaks".


I cut them into strips and placed them in some buttermilk and water.
BTW.... It stunk like fish!!!  I ended up having to leave it in the buttermilk for about 45 minutes because I was called to help my dad for a quick thing.  (If you know my dad, that means about 1 hour)  :)
 After the buttermilk (and helping my dad get the boat ready for the next day) I placed it into the dry ingredients which was cornstarch, flour, Rice Krispies (finely ground up), salt, and pepper.
 Here is my frying station.  The oil is at 350 degrees of canola oil.
 As you can see, one of the reasons we were in California was to see baby Jax.  Since Jax hadn't arrived yet, we were Skyping with Jason at the time.  (I'm also preparing for my food network career)  Just kidding.

Into the hot oil.  Still love that sizzle.  I only put 3-5 pieces at a time so they would not stick together.
 Here is the finished product.  A little bit of salt and lemon juice.  Yummy!  I have to be honest, they never even made it to the plate.  Between my mom, my dad, and I we ate them all.

I thought they were really good.  I loved the breading because the breading was so light and fresh tasting.  Some pieces were better than others.  I did not think they were chewy but my dad thought some of them were.  They didn't even need a dipping sauce.  I will say that Alton Brown states they only needed to be in the oil for 30-45 seconds.  I have to disagree.  I probably left them in for 2-3 minutes.  Overall, I wish I lived closer to the ocean just so I could make them more.  Next up... Chips!!!

Tuesday, July 17, 2012

Chip Chop and Apple Sau......I Mean Corn on the Cob

I am sitting here smoking one of the cigars that I got on my recent trip to Nicaragua thinking about how I want to approach writing the first guest blog of Janelle's trip through the Alton Brown cookbook.  Do I want to make it funny, because after all the first thing that I make is made out of pork chops and potato chips.  Maybe a flare for the dramatic, just think about the movie Cocktail except with a taller Tom Cruise.  Or do I do Alton Brown style and teach about the origin of the potato chips.  Well I guess you will have to read to find out how I write this first ever guest blog.

So the recipe called for all the ingredients any single man would have in his house or in this case a wife that wants to interest her husband in cooking.  I needed one bag of salt and vinegar chips less the 8 handfuls that I ate, 2 big ribbed pork chops, an egg (I chose a chicken egg but alligator eggs would suffice), some vegetable oil, and seasoned flour, oh yes you will learn what that is.


So I started by warming up the oil on one of those really heavy and expensive pans that Janelle loves to get for holidays, birthdays, Mother's Day, and of course Flag Day.  Warming up the oil is easy but lifting that pan was not so I warmed up with some light stretching and did some reps with the pan (3 sets of 10 with each arm).  

Now it is time to crush the chips.  As I thought about using the whole bag I thought that I might like some of those chips for my lunch the next day, so I crushed half the bag.  Now did you know the story of potato chips.  Well you are about to......according to a traditional story, the original potato chip recipe was created in Saratoga Springs, New York on August 24, 1853. Agitated by a patron repeatedly sending his fried potatoes back because they were too thick, soggy and bland, resort hotel chef, George Crum, decided to slice the potatoes as thin as possible, frying them until crisp and seasoning them with extra salt. Contrary to Crum's expectation, the patron (sometimes identified as Cornelius Vanderbilt) loved the new chips and they soon became a regular item on the lodge's menu under the name "Saratoga Chips".  I digress, so I put the crushed chips in pie dish thing.  

In another bowl I whip the egg into submission.  By submission I mean a lot.  There is no fun in doing that so lets skip that part.  Now you soak the pork chops in the egg so that the seasoned flour will stick to it.  Oh yeah, the seasoned flour.  Ok quick show of hands who knows what seasoned flour is.  I want all of you that raised your hands to take a good honest look at yourself via the little box that comes up on Skype and say do I truly know what it is or have I heard of it before.  Now that all hands are down let's continue.  

Now besides not having a spotter to help put the pan on the stove this was my first true obstacle. I could not call Janelle, because first she would not have raised her hand to begin with because it's seasoned flour and as we have established no one knows what that is and secondly, she was working which is why I am guest cooking and blogging to begin with.  So, because we live in a wonderful age of technology the iPhone now makes an appearance.  In the subject line of Google I write "Chicago Cubs Score" (I am guest cooking but I am not dead).  After seeing another tragic loss I typed in "seasoned flour".  Easy enough, right.  Of course not.  There is seven million ways to make seasoned flour.  But here is the best one I found: 2 cups of flour, 2 tablespoons of salt, tablespoon of celery salt (which I think sounds weird), tablespoon of pepper, 2 tablespoons of dry mustard, 4 tablespoons of paprika, 2 tablespoons of garlic powder, 1 teaspoon of ginger, then a half teaspoon of thyme, sweet basil, and oregano.  Mix it all in a bowl and after a quick taste test, it tasted like flour but with seasoned in it.  
  
My goodness can we start cooking because the oil is getting hot.  So we take the pork chop into the whipped into submission egg, then pad it with the seasoned flour and then crunch it in what now might be a third of a bag of crushed salt and vinegar chips (don't judge me I get hungry as I cook).  Now the trick to putting something into hot oil is to not let it jump up and burn you.  Well I am an old dog and do not know these new tricks.  I burned the crap out of myself.  But then you have to flip it after a minute.  That's right you have to burn the crap out of yourself again.  But here is the best part.  There are two pork chops.  Yep I burned myself times two.
Now we put these beautiful pieces of meat on a baking dish and put it in the oven on 350 until the  core temperature is 145 degrees, which is about 29 minutes in.  Throw a few dehusked corn on the cobs in a pot and now we are having fun.  I of course dehusked them myself there is no frozen corn on this masterpiece.  
Well, the final product was enjoyed by the whole family.  The whole family does include our dog that ate most of my kids pork chops as they would only eat the corn on the cob.  My wife thought it was a little burnt tasting but edible.  As for me, I knew I would have to write about the food and I thought it was amazing.  I also got to relive the experience for days and not because there was leftovers.  Oh no, the pork chops were all eaten as was the corn.  But when I ate my normal peanut butter and grape jelly sandwich for lunch the next two days at work I got to enjoy them with some leftover salt and vinegar potato chips.  Thanks honey, this was fun and hopefully people enjoy reading this as much as I enjoy reading yours.  Who is the next guest star,the challenge has been given?


Saturday, June 9, 2012

Fair Food gone Crazy!!!

One of my favoratie foods that you can get at a fair or carnival is a good old corn dog.  I have to admit that Symon and I ate ALOT of corn dogs in college.  We use to get a huge box from Costco and then have 2-3 for dinner.  Yikes!  Things have definitely changed.  I was excited to make "fancy" corn dogs.  The first step was to make the batter station.  (I think I am seeing a pattern here)  The first thing is to combine four, cornmeal, salt, baking soda and powder along with cayenne pepper.  This is the dry ingredients.

The wet dip is a chopped jalapeno, corn, chopped onions buttermilk, and water.


After combining these ingredients I let them sit for 10 minutes.
I decided to bite the bullet and get another "thing" for the kitchen.  I purchased an electric skillet.  I was so excited to use this because this will control the oil to the exact temperature for frying without guessing and because I don't have a candy thermometer, this is a good thing.  I did not go crazy in buying this electric skillet.  It was 12.00 at Fry's.  :)  The fat component for this recipe was vegetable shortening!  Yummy crisco!  4 cups to be exact heated to 350 degrees.
Here is my kitchen ready for frying,  dry then wet then electric skillet then draining tray!  Lets Fry!
I used regular all beef hot dogs.  AB suggests buffalo sausages but I just wanted to start basic.  Into the dry ingredients,
Then into the wet.  I let it drain a little bit off of the dog...
Then into the crisco!  I am loving the sizzle!
Number 2 in!
Flip after 1-2 minutes.  Look at that beautiful golden brown color.  Getting hungry yet?
Note that the stick in the corn dog was not inserted until after cooking.  I think this was a great idea by AB because then the stick doesn't get greasy.  Here is the finished product.  Do you like how I have my work-out cloths on.  I went to work out immediately after which is not recommended.  Holy Heartburn!  The crown was my son's creation and he insistent in me wearing it. It is also optional.
These were really good.  Nice thick breading that surprisingly did not fall off.  Very flavorful especially with the kick of jalapeno in it! I think it was a great idea to also put the baking soda/powder because the breading almost felt fluffy.  Dipped into some good old yellow mustard... what could be better?  My husband really enjoyed this and so did my kids but they mostly just ate the dog.  Crazy kids.  They don't know better yet.  Next up Symon will be doing a guest blog on pork chops.  :)  This girl has to work sometimes.

Sunday, May 27, 2012

Eggplant in Italy

Everyone loves Italian food right?  Even those picky eaters (AKA little ones) will eat macaroni and cheese.  So Italian food plus fried food = AMAZING in this dish.  I was excited to try this Eggplant Parmesan because I really want to like eggplant.  It is really good for you (well maybe not fried) but it has a lot of fiber which the american diet lacks.  Of course I am sure they are talking about fresh eggplant but everyone has to start somewhere.  Eggplant has a lot of water so the first thing was to slice the eggplant into 1/4 inch slices (I think mine were a little larger) then sprinkle with salt and then let drain on a paper towel.  The salt pulls all of the water out of the eggplant (AKA osmosis) because the water inside of the eggplant will come out to even out the salt content on the outside. This is a good thing in this application because we want our "something fried" to be dry.  After sprinkling with salt I placed another paper towel and sheet pan on talk and weighed it down with a book for about 30 minutes.  After this I rinsed the excess salt of of them and dried them again.


Next is the dredging station.  The first is flour with salt and pepper, the second is eggs and a little water and third is panko bread crumbs and parmesan cheese.  I love panko bread crumbs.  If you haven't tried them they are nice alternative to standard bread crumbs.  You can even buy them seasoned just like bread crumbs in the asian food section.


The oil I used for this application was standard canola oil.  I heated it to 350 degrees in my cast iron skillet to about 1/2 inch.  (I also turned the oven on the 250 degrees in order to keep the fried ones warm)  Into the oil they go.  (I bet you can just hear the sizzle right?)


They took about 3-5 minutes on each side and then into the oven on a draining rack.
Meanwhile I just took 1 cup of pasta sauce and warmed it up along with some macaroni noodles.  (I was hoping that would entice my kiddos to eat it) After removing all of the fried eggplant out of the oven I increased the heat to 375 and started to build my yummy tower of fried amazingness.  First a little sauce, then eggplant, then provolone cheese and then repeat twice.  I placed it into a casserole dish and baked them for 10 minutes (until the cheese was bubbling)

Seriously I pretty much ate this out of the serving dish it was so good.  Not only did I eat about 5 eggplant pieces while frying but then had two "yummy italian stacks" with the noodles.  I have decided that the name for eggplant parmesan should be yummy italian stacks.  Don't you agree?  Here is the ironic part... as I am writing this I am thinking.... "shouldn't there have been parmesan cheese since the name is eggplant parmesan".  Guess what,  I apparently forgot to read all of the directions and never even put parmesan on it.  LOL  I can only imagine how it would have tasted.  Everything is better with cheese right?   Next up... we are going to the fair!  Oh my how my cholesterol is rising!!!


Thursday, May 10, 2012

Goin' Southern

I have never had green tomatoes or fried green tomatoes and I have never been to the south. Apparently I have been missing out on a lot. I have also been informed that I have missed a great book and movie by not watching "Fried Green Tomatoes". I was excited to try this recipe.  1st of all,  I had to go to many stores to find "green" tomatoes.  I finally found them at Whole Foods!  By the way, if and when I when the lottery I will be doing all my shopping at this store.  I LOVE IT THERE!  I could spend hours in there just walking the rows of amazing and weird food.  These tomatoes were so pretty.

I thinly sliced them and laid them on the paper towel to dry.  It is always easier to get breading to stick better when the item in question is not wet.  Here are pretty slices. 

Here is my breading station.  On the left is flour and cornstarch with salt and pepper, the middle is eggs and the right is Ritz cracker crumbs.  (Nothing is bad if it has ritz in it right?) 
I got my cast iron skillet (my favorite pan) and heated the oil (I think I used peanut oil) to 350 degrees.  Ok so I don't have a thermometer and apparently I need to get one but I feel like the more I fry, the better I am getting at telling when the oil is hot enough.  I also use a drop of water and put it into the skillet.  If it pops, in my opinion it is ready.  Wonder the science behind that? I took each slice of tomato, put it into the flour, then the egg and then the ritz crumbs making sure to pat it down after every station in order to make the stuff stick. 
Immediately after the frying I placed them on the drying rack in order to let the excess oil drip off. 


OH MY GOSH!!!!  These are amazing.  After the oil I salted them.  They were crispy and the breading stayed on.  I ate able 20 of them.  Seriously!  It was even better when dipped in a little bit of ranch.  I served it with some chicken and apple sausage.  It was a little too much grease for this meal but lets be honest.  We are frying here right?  I had major heart burn after this one but would definitely make this again.  So should I read the book first or watch the movie?  Apparently I missed out on American culture.  Next up we are headed to Italy.