Tuesday, June 28, 2011

Here Fishy Fishy!!!!

I am from the Monterey, California area so I grew up eating fish. Salmon, Shrimp, Crab, Bass etc. etc. I love fish so when I saw this recipe I thought it was going to turn out awesome. It looked pretty easy but in fact it was harder than I thought. Here we have a fish appetizer called Tres Amigos. I don't really get the name besides that it has 3 different kinds of fish. The first step is to make a compound butter. A compound butter is butter that is flavored with anything. It is used as a flavor agent. This was my first time making or using a compound butter but my Dad has made them in the past to put on a steak and it was awesome. The first step was to bring 1 lb of butter to room temperature. Nothing like a little butter to start right? I then chopped up a shallot finely and sweat it in some olive oil over a medium skillet. Now I have not used shallots very often but find that they look like a really big brown garlic. It tastes more like an onion than garlic and has a very mild flavor. This is what it looks like.
Now there is a difference between saute and sweat. When you put the onion into the pan and you hear that sizzle stop because you are sauteing. To sweat is to bring the liquid out and therefore is a very slow process but it makes the flavor more rich. I then added white wine and then let it reduce until "dry" which means no liquid left in the pan.


Then I took it off the heat and folded in some parsley. Flat leaf Italian parsley to be exact. Now I am not a fan of parsley and especially curly parsley. It must be from all of those days working at Applebee's putting that limp green on every plate. I then took the yummy pound of butter and put it into the mixer and added salt and pepper. I then poured the shallot mixture into the butter and mixed and then folded the home grown basil into the butter.
I then placed the butter onto some wax paper. Well, it called for wax paper but all I had was parchment paper, and then I rolled it into a log shape and put it into the freezer for the night.

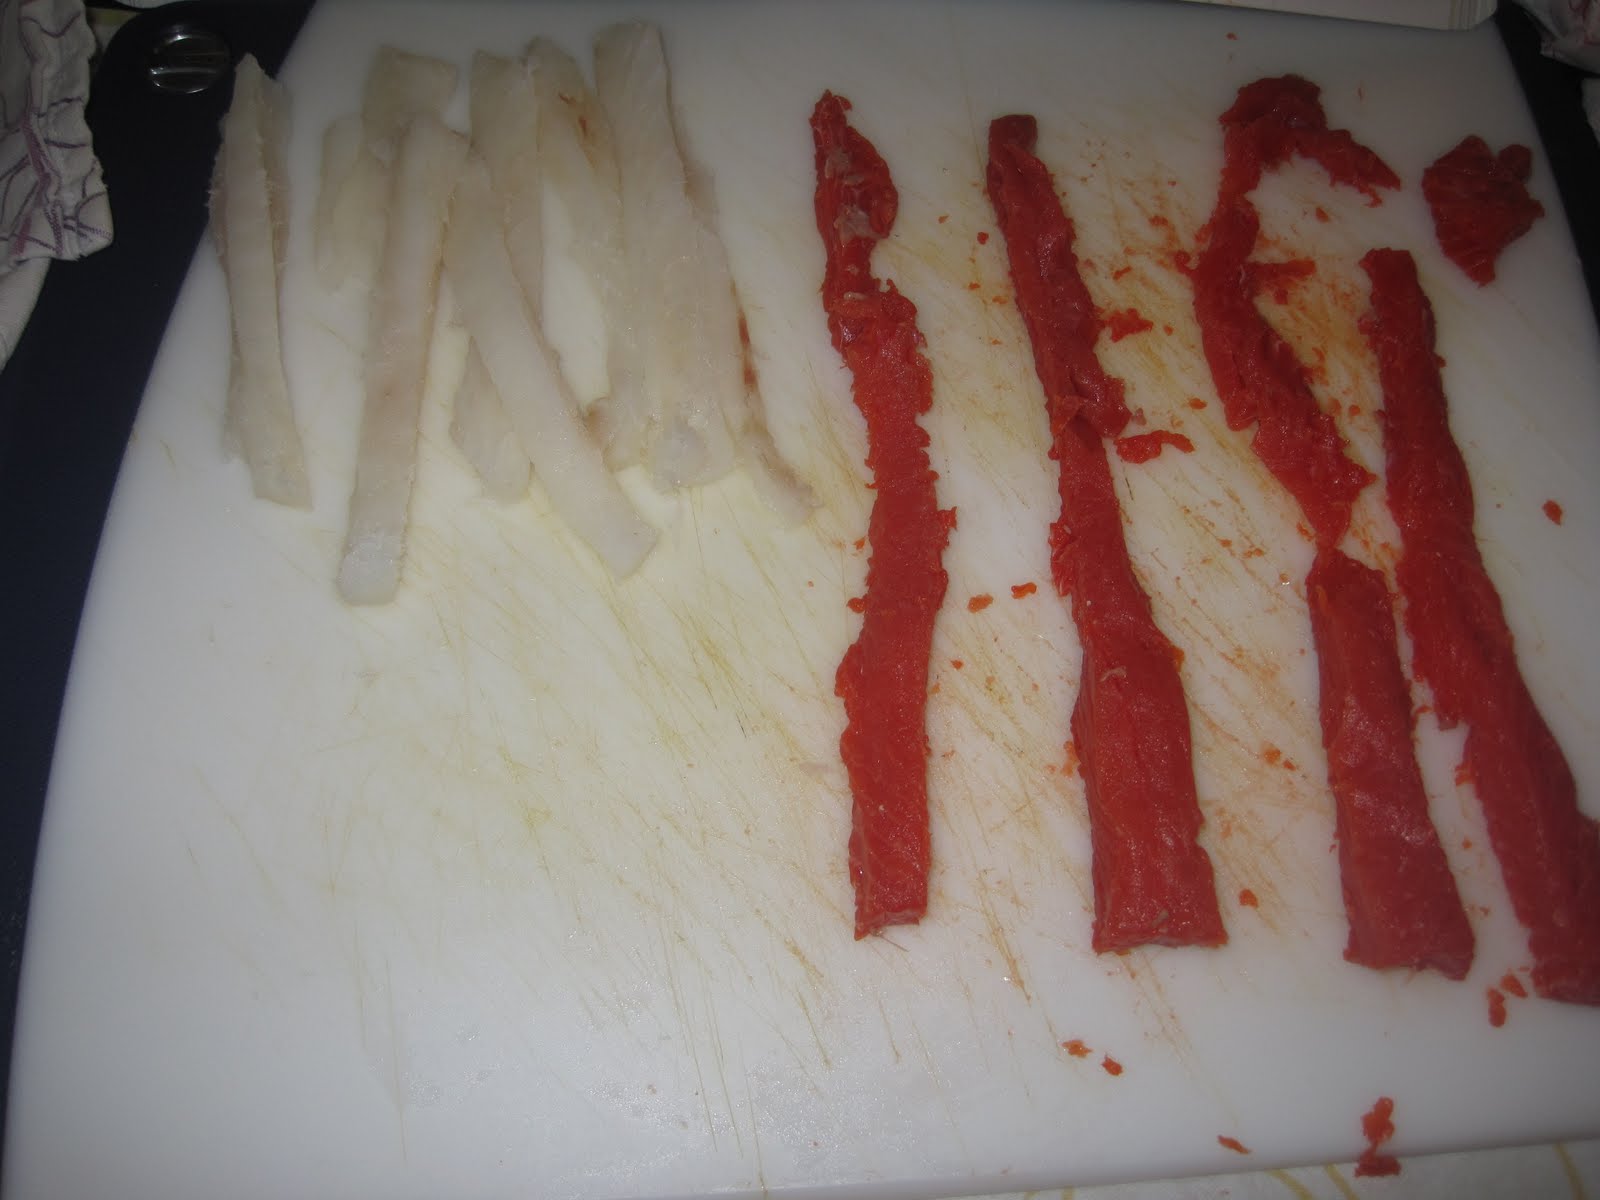
Now time for the fishy.... Scallops, salmon and halibut to be exact. I was in luck that Bashas had both fresh Scallops and Salmon. Of course for a ridiculous price but its all in the name of science right. I actually had some halibut in my freezer so on I went. For you fish virgins, the white fish on the left is the halibut and the one on the right is salmon. Both yummy.

I bought 1/2 a pound of each and then attempted to slice them into four eight strips which is ALOT harder than it seems. I am not sure if it is because I have crappy, not sharp knives or what but I ended up having to saw the fish which in turn made it mushy and not pretty. This in turn made the rest of the process very VERY difficult.

The goal was to create thin strips and then to layer the strips, one halibut and then one salmon to wrap around the scallop. Do you know what a scallop is???? I knew it was some kind of fish, I have seen my mom eat one or two in her time but not exactly sure what kind of "fish" it was. Thanks to wikipedia it is an "abductor" muscle that is housed in a very pretty shell. Yummy :) Actually yes. The goal of this recipe is to create a "rose" like look around the scallop. This is WAY easier said than done. Because of my poor carving skills ( I definitely could not work at a sushi bar) the pieces of the salmon and halibut were not long enough to wrap around the entire scallop. Now thinking about it, I wonder if there are different size scallops and the ones I used were too big. Here is what mine turned out to look like.
As I said before, I do not have a broiling pan so as you can see I have my makeshift one. :) I then cut a small slice of the compound butter log and placed a slice on each scallop. I then placed it into the broiler for 8 minutes.

Now AB states to serve the fish medium rare which is a little scary to me. I know some people eat raw fish but on this day, I guess I wasn't up to testing the limits of my stomach. On another note, I did just tried Sushi for the first time which has made me love fish more and more. Don't be scared if you haven't. It is amazing!!! Ok, that was my rant for today. So because I was scared of raw fish, I cooked it for another 2 minutes. After a total of 10 minutes I removed the fish and served.

Overall I turned out really pretty. I was excited to try it. I am guessing it is meant to be eating in one bite which we both attempted to due but it was difficult which again makes me think the scallops were too big. The fish was "I think" cooked. It was good but I could only eat one or two because it is ALOT of fish for one bite. I think the thing that made it was the compound butter. It was so yummy. I am glad I have an extra log for some steak for chicken next week. :) With regards to taste, it was ok. I would not make this recipe again because I am not confident in my fish cutting skills. I will have to work on that. :) Next up is broiled chicken breast.

One other thing. I finally read and watched the movie Julie and Julia. The book and movie were ok. I was slightly disappointed. Maybe because I was expecting more. Anyways, I am hoping to make this blog a little more exciting. Please join me in giving me suggestions on how to improve. :) I wonder if anyone else is even reading this besides my mom. Hopefully yes. :)


Tuesday, June 21, 2011

Breakfast for Dinner? Hell Yes!!

Now we all know that everyone LOVES breakfast for dinner. This recipe doesn't have to be for dinner but I wasn't about to try to make this just for my kids. Lets face it. It seems like they are not eating anything these days but fruit snacks and ritz crackers. GRRRR. So I decided to make this "breakfast" for dinner. I started with defrosting some frozen spinach and hash browns. I love the way Alton Brown writes his recipes. This recipe was created when he was in college and therefore he states, "Remove hash browns from freezer to a sink full of water to thaw. Go back to bed. Get up half an hour later and drain potatoes". I love this. Since I was making it for dinner, I removed the hash browns from the freezer, into the sink and took the kids swimming. :) I came back and combined the hash browns, defrosted spinach and two eggs together and added salt. Two important steps were done during this. Don't forget to turn on the oven to broil... AKA 500 degrees, move the shelf to the top and put your trusty cast iron skillet in the oven to heat up. You Have Gotten One like I told you right? :) The second important thing is to dry the hash browns and spinach before you combine. The point???? Do you want soggy hash browns. I sure don't. The way that AB suggests to do this is brilliant. Salad spinner. I didn't use to have a salad spinner and thought why did I need one when I could just dry it off with a paper towel right. WRONG!!! I finally got what I thought would be a uni-tasker and learned that it is not only for salad. It worked awesome for getting my potatoes and spinach dry. I will be using it more often now. Here is the mixture before cast iron skillet.


Next I pulled out my skillet from the oven, placed some oil on the bottom and then placed the spinach and potato mixture on the bottom. Love that sizzle!!! I then took some store bought salsa and place it on top and then back into the oven. For 12-15 minutes. Mine was about 14.

Removed the skillet and place some mozzarella cheese on top and then cracked four eggs on top of this mixture. I was very disappointed because the eggs slid to the side and were not evenly distributed. I was more than disappointed. If you know me and my anal ways you would understand. I couldn't very well grab it and then move it back so into the oven, AKA broiler for about 4-5 minutes or until the egg whites set.
Now I know what you are thinking. This recipe is sounding and looking weird right. We were right there with you. But... it smelled really good. Seriously. I was really excited to eat it which is saying a lot because some of these recipes have not been so good. Like chicken on a stick. I still gross out when I look at that pictures from that post. I was slightly afraid of having under cooked eggs so I left it in without checking it for the full 5 minutes. I pulled them out and it was perfect. The eggs whites were sure set.

Now again, remember that this recipe was created by a college student who had no money, had an oven that only broiled and that the rack could not move from the top shelf. Alton Brown at this time only had one pan, that he stored in the oven.... The famous CAST IRON SKILLET. (Have I mentioned how much I love them) So he suggests passing out forks to all party guest and digging in. Now I KNEW that my kids would not eat it like that so I cut it into slices like a pizza. Here is where I was sad because I could not cut them perfect so each person could get an egg. Not sure how I could have made this work better. But here was Symon's piece.
It was actually really good. Alton brown also suggests serving with a flat left over beer. Both Symon and I thought that this would be a great morning breakfast after a night of drinking. Too bad we are way too old for that. :) Symon's egg yoke was completely hard and he loved it. He added some red pepper flakes and Tabasco to heat it up a tad. My egg was still running in the middle which ended up being super good because it made sort of like a sauce over the top. Overall I loved it. You could totally change it up and add bacon or ham or more veggies. Of course Ryan would not even touch it and Reagan ate a couple bites and was done. I will totally be making it again. What is your favorite hang over breakfast. Not drink but food. :) Let me know. Maybe I will start drinking to try them out. I doubt it. :) Next up... more fish... broil style.

Thursday, June 16, 2011

Broiling 101

Time to get your broil on. Broiling is just like grilling up side down. Think about it.
Step 1: Place item to broil on broiling pan. (Now if you don't know what a broiling pan is, look under your oven for that pan that came with the oven. The one that you never use. It looks like a pan with a grate over it) This is just like grilling.
Step 2: Place the item really really close to the heat source in your oven. Mine is on the top.
Step 3: Broil!!!!
Just like grilling but the heat source is on top of the food. There are a couple of pros to boiling verses grilling.
1. No smoky taste. (if you don't like that)
2. No flare ups because the drippings are not dripping onto the heat source.
3. You don't have to go outside. :) ( ok so this is not a big deal for us Arizona folk but I would think that you live in Chicago this make be a plus if you are craving a grilled steak in the dead of winter) Plus turning on the oven to a really high temperature may actually warm your house as well. :) Double bonus. Of course when it is 110 degrees outside. Staying inside might be better anyways right?

The first broiling application is steak. Flank steak which in my opinion is a great cut of meat. Flank steak is a cut of beef that comes from the belly of the cow. Because it is from the belly, the cow does not use these muscles as much as say the back so there is a lot of fat running through the meat. Fat (in meat) equals flavor. Don't you wish it was the same for people. Now I am not one to just eat a big piece of fat (like my hubby) but I really like flank steak. Because it is relativity cheap (for steak) and a large piece of meat, it can serve a lot of people or meals in our case which is why I have cooked it a lot.
The first step is to create the marinade. This marinade was made in my new HUGE food processor. I put one onion, garlic, ginger, white wine, soy sauce, worcestershire sauce, honey and extra virgin olive oil. And don't forget salt and pepper. Go easy on the salt because both soy sauce and worcestershire sauce has a lot of salt in it. We pretty much ALWAYS have these ingredients in our house which I was very happy to see. I put all of these ingredients into the processor and chopped it up into a smooth paste/liquid. I put the steak into a zip lock bag and poured the marinate into the bag and into the fridge it goes for the next night. :)


In the afternoon before cooking I took the steak out to let it come to room temperature. I then took the steak out of the bag, wiped off some of the marinade and the placed it on a rack to let it really come to room temperature and dry a little bit.

Then I turned on the oven to 500 degrees or your broil on your oven and then move the rack to the top of the oven. You want the item for broiling within 2 inches of the heat source. And really REALLY 2 inches. (I did not do this :( ) Then let it warm up. Place the steak on the broiling pan and into the oven. Here was the bad news. I do not have a broiling pan. Obviously the person who lived here before us took it with them. I made a makeshift pan by putting a cooking rack on a cookie sheet with foil under it for easy clean up and place it into the oven. After 4 minutes on one side you flip. When I flipped mine, it definitely was not cooking so after the 4 minutes I moved my meat up to the very VERY top. After another 4 minutes and turned. After 8 minutes (or 12 in my case) I removed the steak and let it rest for 5 minutes.

After resting for 5 minutes I cut. On one side of the steak was a perfect medium rare and the other 1/2 was rare!!! One side had a beautiful crust on it and the other rare side did not. I served the med rare pieces with garlic toast and peas or green balls as they are called at our house. Symon and I both enjoyed the steak but found it better if you ate a piece of steak with a piece of garlic bread because it added the crunch factor. Which means added texture in food language. Almost like an open steak sandwich. It was really good. I really liked the marinade flavor. Both Symon and I felt that if we had cooked it closer to the heat source then we could have gotten the crust on the steak that we liked.

The best part of this steak was the next day I used the rare pieces and sautéed them with red and yellow bell peppers and some spices and placed into a tortilla. Now lets face it. EVERYTHING is better in a tortilla right? :) Give me your thoughts on broiling and what your favorite thing is to broil. :) Next up.... breakfast.

Wednesday, June 1, 2011

Grilling Side Dishes

We are at the end of the grilling section and we are finishing it up with side dishes. This two side dishes both turned out great but I wished I could have done them on a "real" charcoal grill and not the gas grill as you will see. We will start...

Dish 1: Tropical Hash!!

Sounds yummy right! You are right. It was awesome. Let me say that I am a huge fan of grilling and grilling plus sweet potatoes in an awesome combination. First lets get something out of the way... Yams vs. sweet potatoes? Yes there is a difference. When shopping for a sweet potato you must look for the light colored (almost pale pink) skin potato. These potatoes are much more starchy and less sweet. The more common "yam" that we all know and love thanks to Thanksgiving is the darker orange color one that is considerable more sweet than the sweet potato ironically. :) The hash calls for sweet potatoes but less face it... Yams are the bomb and I LOVE them. They are also more Caribbean in nature (where they are grown) and therefore I choose yams. (Ok so I didn't know all that stuff before I purchased the yams but obviously I made the right choice right?) Ok so you turn your grill on and grill the sweet potatoes (yams) :) for an hour which will make the potatoes soft. Basically what you do if you cooked regular potatoes in the oven for baked potatoes. Now, if I had a charcoal grill this would be no big deal and probably next time I go camping I will make this but heating a gas grill for 1 hour is a pain and uses a lot of propane. Not saying it's expensive but just for a side dish is crazy.
With about 20 minutes left I put 1 banana on to get black on the outside. As you can see we threw on some teriyaki steaks to put some of that heat to use.

Inside the house I warmed up some coconut milk and butter on the stove to just about boiling. Once the potatoes and banana were soft and black (banana only) I mashed them with a fork to a mash potato like consistency. Now I know some of you like mash potatoes with lumps and some without. To be honest, I was too lazy to pull out the mixer and I do NOT like lumps but wanted to follow the directions as closely as possible and AB calls to fork it.

To make the smooth consistency I added the coconut milk/butter as needed to make a yummy mash. Serve on side of chicken of steak as seen here!!! YUMMY!!!

Now I have made sweet potato mash (yams) but not on the grill before and Symon said it was too sweet. He loved this tropical mash because (in his words) "the coconut milk and banana made it awesome". We did not get any BBQ type flavor out of this. Of course we did not use a BBQ technically, gas instead. So unless you have your grill on for something else, it doesn't matter if you make this in the oven or outside. It is awesome. It should be noted that both of my kids tried this and did not like it. Go figure.

Dish 2: Grilled Romaine

This dish was not a surprise to me. I have heard of grilling romaine before. I though this would be an easy one. Again, I questioned why to grill it when it is literally on the grill for 1 minute total. Was it even worth turning the propane on? Guess we would find out. I took one heart of romaine and cut it into quarters. Drizzle with olive oil and season with salt and pepper.
I then proceeded to make the dressing/vinaigrette. This included whole grain mustard, apple cider vinegar and capers. I have never had capers before so I decided to chop them. (not called for in the recipe) because I was afraid to be honest. Plus when I was telling my mom about the recipe she said she didn't like capers which worried me a bit more. I know they are pretty salty and are usually used for the salty briney (not a word but you know what I mean) taste so it couldn't be too bad.

I placed the 1/4 romaine pieces on the grill and turned ever 15 seconds. The goal is to get a char look/taste without wilting the lettuce too much. I was never able to get a grill mark before the wilting happen.

Then you take it off, serve whole with dressing on top. Now this is not the most easiest way to eat a salad so Symon and I decided to cut it up and add some leftover grilled chicken on top as seen here.
We ended up adding parmesan cheese and croutons in the end because the lettuce was really wet tasting which we think was because I put too much olive oil on the romaine at the beginning before grilling. Overall I would try this dish again. Maybe even put it into a tortilla to make a caesar wrap. (which we had tonight)

Overall grilling experience was great. I have much more confidence in grilling. In the future I would like to have a "real" grill or camp more so I can BBQ more and get that smoky flavor. Let me know your favorite thing to grill and maybe I can add it. The next section moves on to broiling which is actually upside down grilling. Think about it!!!!