Friday, March 21, 2014

Dried Beans Experiment

Dried Beans Experiment

Water can be a very powerful thing.  It can knock you over in the ocean, it can flood a city, it can help to feed and grow plants, and it can even made or break a meal.  In this next section of "water" we learn about simmering.  Anyone who has ever attempted to cook, even a boxed meal has read the word simmer in the directions.  Have you ever wondering what it actually meant?  I thought it was heating something up until it started to make that, "its too hot and you better turn the heat down" sound.  Usually it includes the sound, "oh crap" which means that I walked away from the stove and my pot boiled over and then I had to run, move the pan and then turn the heat down.  Can anyone relate?  

Simmering basically means to bring water and some target food to the narrow range of 175-200 degrees.  LOL.  Who measures this temperature?  Not me.  Only if I am making some sort of candy or a raw meat product.  This basically means until there are tiny bubbles that form at the bottom of the pan and then travel to the surface.  Anyone see a couple of problems with this?  First of call, my electric stove in notorious for not being able to "slowly" do anything.  It is either boiling over of not hot enough.  Ok, so I like to blame things on my stove instead of my impatience.  Second problem that I see is that how are you suppose to see these infamous bubbles with things besides water in the pot or when the pot is covered.  Because of these two problems,  I rarely "simmer" anything.  I was bound to figure this out!  

The dried bean experience was a chance to figure this out.  I started with 1 lb of white navy beans.  Why navy beans?  They were on sale, only $1.09 for a pound and I love the navy bean song from Adam Sandler.  Thanks Symon.  I started by inspecting the beans for any discolored, cracked, or shriveled beans.  I then rinsed them.   The next step is the soak the beans.  I never understood this but it makes the beans cook faster.  LOL, it obviously doesn't take into account the soaking phase right?  I basically soaked them in the pan I was going to cook with in water for 5 hours.   This is where water can be powerful.  Not enough soaking time and the beans will take twice as long to cook; soak them too long and they get mushy and flavorless.  Not good eats.  I am going to be lucky to get my kids to eat them with flavor.  


After soaking, I rinsed the beans that have doubled in size by this point.  I seasoned them with salt which is VERY important while cooking with water.  If you don't know why, go look up osmosis baby!  I placed the beans and 4 cups of chicken stock in the pot over medium/high heat and bring to a boil.  (I got the boil down).  In another pan I was suppose to heated oil, garlic, and rosemary for a few seconds until nice and brown and it releases it oils.  I skipped this step and just threw it all in the pot because I didn't have fresh garlic so I used garlic powder. I also didn't want to wash another pan.

 Into the pot with the beans went  2 TBSP of garlic powder, 2 sprigs of rosemary, 1/2 cup diced carrots, 3/4 diced onion, and 1/2 cup of diced celery.  Don't forget the pepper.

 The best part of this recipe is that I do not have to stand by the stove.  After adding all of these ingredient, I placed the top on the pot and placed it into the oven at 250 degrees for 1 1/2 hours.  This is the best way to simmer ever!!!!

Once the time is over, I added a little more salt and pepper and then served with fresh bread. I had some diced ham left over from a previous meal and then added it into the "soup" to bribe my kids with "bacon" so they would eat it!


Symon, Ryan, and I loved it!  Ryan is learning about pioneers in school so we talked about beans and how "practical" they are to eat as well as cheap and full of protein and fiber.  They are perfect to use leftover food at the end of the week. I think dried beans is a great staple in the pantry.  I can imagine the pioneers making this sort of stew or soup over a fire in their cast iron dutch oven.  Of course Reagan did not appreciate it and ended up having yogurt for dinner.  Can't please them all.


Sunday, January 26, 2014

Poaching 101

We have arrived at the 5th chapter of Alton Brown's, " I'm just here for the Food".  This chapter is called boiling.  I think it is ironic that people who say they, "can't cook" say they can't even boil water.  So let's look at what boiling water is.  First, AB goes into great detail about how important water is to cooking and how there are many different "varieties of water."  Tap, bottled, filtered, sparkling, and spring water.  These all have slightly different qualities and therefore should be used differently.  There are many things you can do that are concidered boiling.  In this application we will be poaching.  Poaching is defined as cooking food GENTLY in liquid that has been heated until the surface just begins to quiver. Quiver is very scientific term don't you think?  AB calls that the temperature between 180-185 degrees. He also says that the best things to poach are fish, eggs, and chicken breast.  Now, the first thing I usually worry about when cooking eggs and chicken is, if I cook it slow, how do I know if is going to be cooked and if the surface bacteria will be killed.  This is solved by starting the liquid at a boil and then dropping to the desired temperature.  This ensures that the bacteria is killed and the food is not overcooked.  AB gives two ways to poach a chicken in the first application.  

#1:  Using a heavy bottom pot and fill it with white wine, black peppercorns, coriander seeds, and dried thyme. 


The whole bottle of wine and spices went into the pot.  They whole broiler chicken then goes in.  Don't forget to remove the "parts" inside the cavity and rinse the chicken.  Then fill the rest of the pot with water (I used tap) until the whole chicken is covered. 
Put the pot onto the stove and turn to a boil.  I then placed the probe into the thickest part of the breast.  With my probe it also measures the outside of the probe which would correlate to the water temperature.   The process took about 2-2 1/2 hours.  It made the house smell amazing with the white wine.  This mama loves wine so I was happy.


After the chicken reached the 180 degrees, I removed the whole chicken and let it drain.


At this point I removed the skin and picked/carved the chicken.  The chicken was easy to carve if you know how to do it.   I have done it about 100 times so I feel very comfortable with this, but it can be a daunting task.
I got an abundant amount of chicken that was moist and juicy.  You could definitely taste the seasoning including the white wine.  Yummy!

You are then left with the juices and bones that was left over.  This would be great for chicken stock.  I did not do it because... well I have two kids who were already whining about dinner.  Maybe someday, but not today.

This chicken was served with rice and roasted summer squash.  It was yummy.


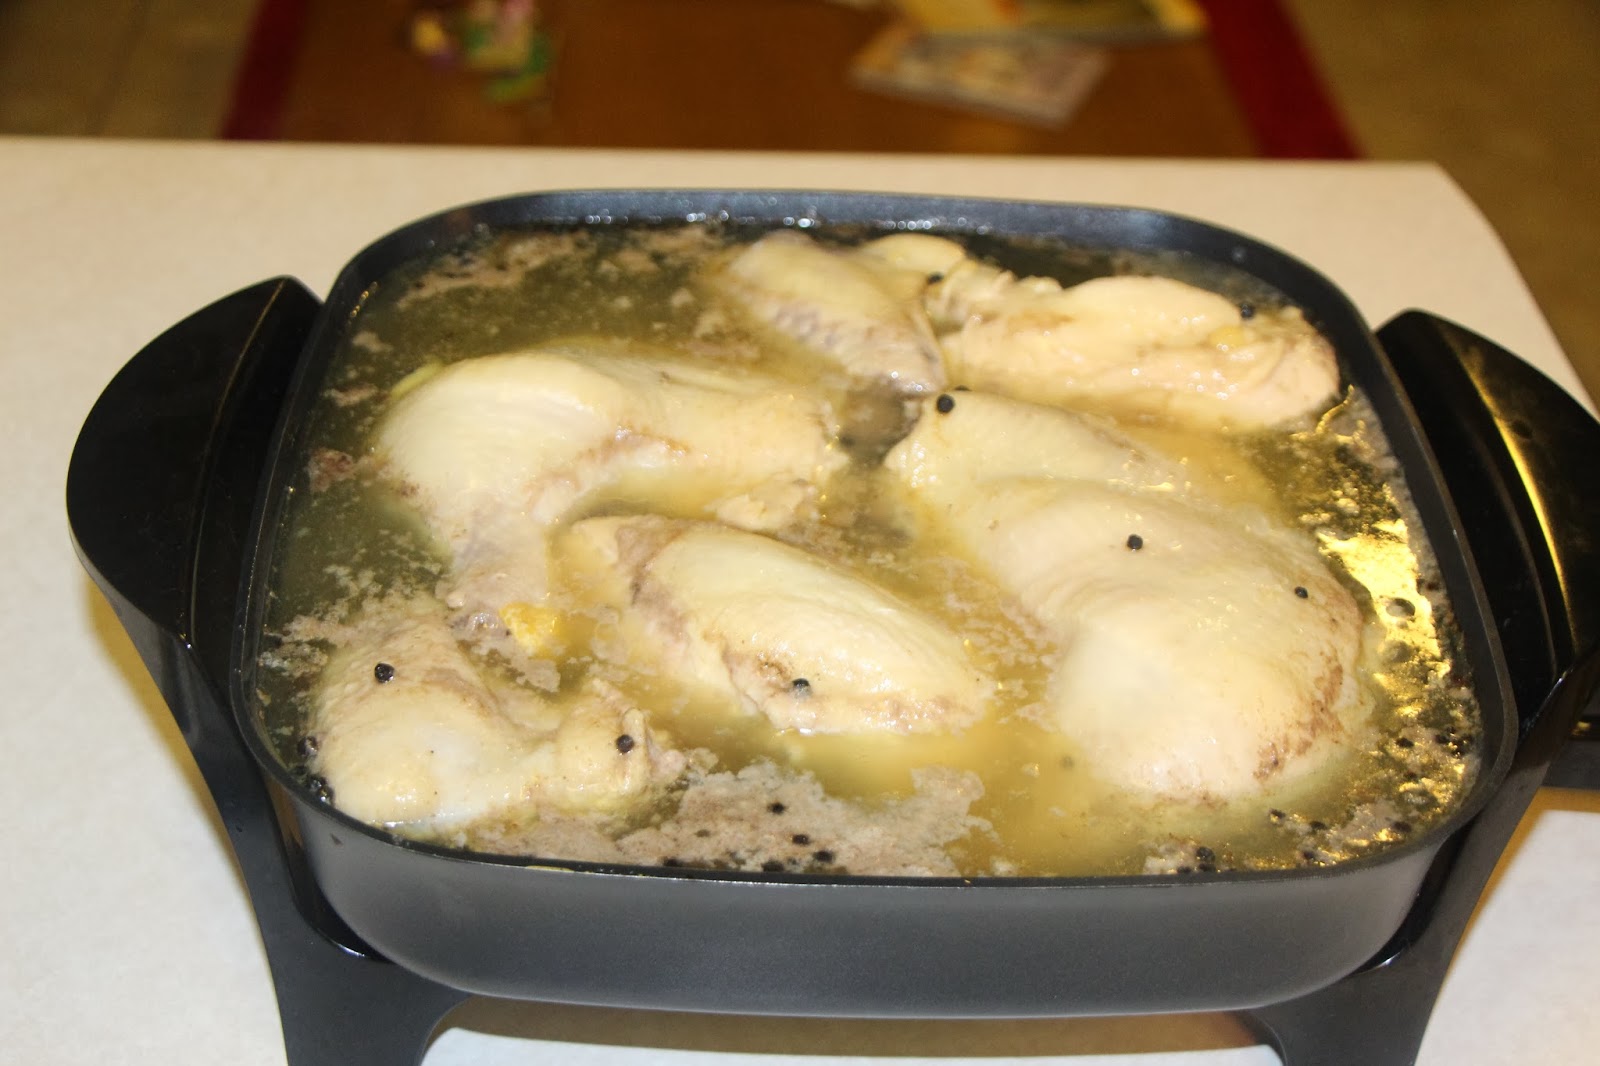
#2 Method: This is also poaching chicken, but using an electric skillet.  I placed the wine and black peppercorns along with a bay leaf into the skillet.  


For this method, the chicken is cut into parts before the cooking.  I found this more difficult.  I was worried about raw chicken flying throughout my kitchen. 

I then placed the chicken breasts, thighs, and wings into the skillet and placed water in the skillet until the chicken is covered.  I want to note that I left the skin on.
This method was a lot easier for me, because I didn't have to sit by the stove the whole time.  I set the skillet to 185 degrees and then place the probe into the thigh and set it for 185 degrees.
After about 2 hours I removed the chicken and was again left with the leftover liquid.  I was more apt to use this liquid because there wasn't any bones and ligaments left in the liquid, but again I didn't save it because I was just cooking this chicken to use in a later time.
Here is the chicken.  I let the chicken cool and then removed the chicken off the bone.  I placed this chicken into a storage container and ate the chicken all week.  We made chicken salad, chicken enchiladas, and chicken stir fry.  It was nice to have chicken already cooked.
I liked both of these methods for chicken for different reasons.  All in all, what a great way to prep for the week.  Make one whole chicken and eat chicken 2-3 times during the week or make freezer meals.  The chicken was WAY better than boiling the chicken and not watching it.  Poaching is the way to go.  Try it out!

Friday, January 3, 2014

Spaghetti Remake

We made it.  This is the last application of Sautéing.  I have learned that there are many uses for this application that can increase flavor while saving calories.  I am going to call it the healthier way to fry!  We have made everything from popcorn, tofu, veggies, fruit and fish.  Overall, I think most anything can be sautéed as long as it is uniform in size and shape, you have a good pan and a fat such as butter or any kind of oil.  One of the best things I've learned during this process is the idea of adding an ingredient after cooking but before serving.  The one that sticks out in my mind is the vinegar in the green beans.  That splash of red wine vinegar really changed the taste of the green beans and made veggies that night a little more interesting without adding a ton of calories. 

This last application is called "Swiss Chard with Garlic and Tomato".  Swiss chard is one of the veggies that I don't find myself buying regularly at the grocery store.  Before I had tried it, I thought it was something only eaten in the South.  As our family is learning to eat healthier and with more variety, we have eaten this a couple of times, mostly by steaming.  I will tell you it is similar to spinach when cooked.  It doesn't really have a strong flavor and can be easily hidden in something like spaghetti.  For this application, I started by making a combination of butter and flour in a bowl into a paste.  Guessing at this point that it will be some kind of thickening agent. 


After this, I prepared the fresh swiss chard.  The recipe calls for it to be blanched and chopped.  I have decided that it is a pain to blanch veggies that I might not even taste.  Blanching, for those of you who don't know, is to place an ingredient (swiss chard in this case) into boiling water for a short amount of time and then into an ice bath.  The purpose is to soften the veggies while retaining its color and some texture.

The sautéing application comes in when we heat olive oil to medium heat and then add pinion, garlic, red pepper flakes.  This is a slow cooking process to bring out the flavor and caramelization of the onions.  I LOVE cooked onions.  The smell of garlic and onions in the sauté pan makes me happy.
Here are those beautiful onions.... which then I added the flour butter mixture.  I will have to admit.  It said to whisk it but it was not really that possible.  It became clumpy for lack of a better word.
Next into the party is the canned crushed tomatoes and chicken stock.  At this point I would like to point out how much cheaper it is to buy a can of diced and/or crushed tomatoes than a jar of pasta sauce.  Don't be lazy people,  get the cans, added some seasoning and you have pasta sauce just as quick as opening a jar of PREGO.  (I love prego by the way)  It taste fresher, probably has less crap in it and for sure less sugar.  You can do it guys.  Don't be afraid.
Here is my beautiful thick sauce.  At this point I added the bow tie pasta and the blanched swiss chard.  To be honest, that huge bunch turned out to be about 1/2 cup of soft soggy swiss chard.  It went into the pasta sauce.  At this point I have to show you our family bowl.  This meal was definitely a HUGE family meal since it is basically pasta and red sauce.  If you can't read it, it says, "Give Thanks for the Big Game"  This shows are favorite holiday (thanksgiving) and sport (football)
After putting the pasta into the bowl, we topped it with fresh rosemary and fresh parmesan cheese.

This was a double thumbs up from everyone in my family.  I love that I probably don't even need to look at the recipe to make this one again.  This could also be changed up with spinach, kale, and rainbow chard, any different shape pasta or herbs.  Maybe basil instead of rosemary.

 Hope you have enjoyed sautéing with me.  We will now be moving into poaching.  I have to be honest to say that I have never poached anything so this should be interesting.  Hope to see you soon. I promise I will finish this book some day. 

Sunday, December 29, 2013

Why is it taking so long?

Popcorn Au Natural

I love myself some popcorn.  I grew up with my mom having the huge air popper with the popcorn popping all over the place as we waiting patiently for the popcorn to be done.  I also remember the jiffy popcorn.  You know... the kind you hold over the stove and shake until its done?  Basically a huge fire hazard.  With the invention of the microwave came microwave popcorn.  Any breathing person including my 6 year old can make popcorn in the microwave.  As I get older and start looking at ingredients I realized all of the "extra" ingredients that is in microwave popcorn.  I also realized that it is much more affordable to buy plain popcorn and make it yourself.  Because of that, I was very excited to try to make "au natural" popcorn.  I started with 1/2 cup of popcorn kernels. 


I even bought the generic target brand!
The recipe called to put the popcorn kernels, 1 TBSP of oil and a pinch of salt into a large stainless steel bowl.  It then says to cover with foil and puncture a couple of holes through the foil and place it directly on the stove.  This was not successful in my case because #1, we have an electric stove, #2 my stainless steel bowl either was dirty on the bottom or has some other material because it melted.
I started again with my large pot. Repeated the process but used the top instead of the foil.  I constantly shook that huge, heavy pot for 3-5 minutes.  It was kind of exciting and nerve racking to do because I didn't want to burn the popcorn plus it weigh about 5 lbs!  If you have ever burnt popcorn before...it makes the house stink for hours!!!!  It was a huge success.  I then melted 2 1/2 tbsp of butter in that trusty microwave and put it on the popcorn with salt.


My kids LOVED it.  We also went to the movies a couple of weeks later and Ryan and I decided that my popcorn was way better than the movie popcorn. I call that SUCCESS!  Popcorn, a healthy high in fiber treat, that my kids loved, with no added ingredients that literally caused me less that $1.00 to make!  Yea!!!
There are tons of options to change up the popcorn... parm cheese, cinnamon and sugar, chili powder. The options are endless!!!  What is your favorite?  

Sunday, October 6, 2013

Wontons with friends!

Since I started this blog, I have not cooked for anyone but family.  Not sure why.  I guess I am nervous that people will think I am weird, that it would turn out bad, or the pressure of cooking for someone else made me nervous. Seriously, even at birthday parties for my kids I freak out a little bit that everything tastes good.  After I cooked my tofu from the last post, my really good friend came over and wanted to know what the smell was and why I didn't cook for them more.  Honestly, every time we get together we end up ordering pizza.  I decided after that, that I should relax and share my experience with them.  This one looked fun to try.  I started with canned chopped artichoke hearts.  This is a new staple for me in my pantry.  I have added it to rice, pasta, or salads and adds veggies with not much thought.  
I added bacon, feta cheese, salt and pepper and 1 egg.
While cooking for this particular friend, she offered to help.  If you do not know me, I am a huge control freak.  I am pretty much in high gear when I am cooking.  Because of this, my children rarely get to help me.  LOL.  I made a change and let her help me.  We started with wonton wrappers and placed 1 tsp of the mixture in the middle of the wrapper
We then used our finger with cold water and outlined the wrapper.  The point of this is to seal the wonton.
This recipe makes 35-40 wontons, so while we were assembling the wontons we kept the other ones on a wet towel.
Once they were all made, I turned the oven on 200 degrees to be able to keep them warm.  I placed 10 wontons into a med-high pan with 1 tsp on olive oil painted on the bottom of the pan.
After two minutes on one side, I flipped them.  They are very delicate so I ended up using a spatula instead of a fork.  Once then are flipped and then browned on the other side I added 1/4 cup of hot water to steam them.  After they were steamed for 1 minute I placed them into the oven and repeated the process.
Here are the finished products.
Overall, they turned out pretty good.  Symon loved them.  In the words of my mom, " I love cooking for Symon because he loves everything".  As for my guests they said they liked them as well.  Lets be honest, we decided the bacon made them. I felt some of them were greasy.  After we ate them, we decided that it could be good if we added some heat with jalepenos or a spicy sauce.  We also had some spicy chip dip that we ate with it.  It was good.  I suggested soy sauce or a sweet and sour sauce as well.
I really enjoyed cooking with friends.  After looking back.  I will be trying it again.  These two particular people were great sports and can't wait to cook again for and with them.

Is anyone else sick of Tofu experiments?

I just cringe every time I see tofu as one of the ingredients.  Literally I can hear my family complaint before I even put it on the table but here we are.  TOFU again.  Apparently, I will be trying every single cooking method with tofu until I can find the one that I can at least be able to swallow without gagging.  As before, I started with a block of tofu, drained it and then placed paper towels around it and then placed cans on top for 12 hours. This is to dry up all of the liquid, so the tofu can absorb the flavors that it will take on. 


We then create the "sauce" that the tofu will take on.  This is a sweet and sour tofu.  Ingredients include soy sauce, garlic, ginger, flour, and corn starch.  Into the fridge with the dried out tofu to marinate overnight.  I had horrible flashbacks from a prior recipe for peanut butter chicken made a couple of years ago.  The consistence of this marinate was so gross, but we digress.


At this point I would like to point out the ingredient list.  In my experience a ingredient list this long equals a lot of time and work for something not worth it.  Seriously,  I want to cook out of my kitchen pantry.
After the marinate part.  Here are the results.  Most of the liquid was gone.  It was really mushy looking which again freaks me out.

Onto the first "cooking" step.  This is the frying station.  Tofu, then flour and then my electric skillet with crisco melted.  I didn't have enough vegetable oil so I had to think what did my mom use.  I distinctly remember my Mom using crisco in her baby daddy frier.  It is a shout out to you Mom!
The cubes of tofu goes into the flour and then into the oil.  I love my electric skillet.  It takes the work out of frying because it keeps the oil at the perfect temperature.  Especially because I have an electric stove which makes it even harder.
Here is Symon testing the fried tofu.  He loved them. Now we make it into sweet and sour tofu.  I placed the fried tofu into the oven at 200 degrees to keep them warm.
I made my own sweet and sour sauce with ketchup, sugar, vinegar and honey.  It took ALOT of ketchup and I am not a fan.  I was a little grossed out at this point.
I diced up some veggies: bell peppers, carrots, onions and celery.
The veggies are saute' in a skillet at med/high heat with a little bit of oil.
Tossed with the tofu and then covered in sauce and let it come to a boil and then removed.  Here is the finishing product.
 I will be honest, it was definitely smelling like a chinese restaurant in the house.  The results were good, but not as good as many chinese restaurants I have eaten at.  The conclusion was that we liked the fried tofu plain as opposed to the whole dish.  As a side note, it was really gross the next day for left overs.