Tuesday, September 23, 2014

Fish with a HEAD!

Fish with a HEAD

Growing up near the ocean, I grew up seeing fish with heads at the grocery store.  I remember shopping with my mom and seeing the fish with the plastic wrap on in.  I would push the eyes in.  I know, weird right but I did.  When this recipe came up for "steaming a whole fish", I looked forward to trying this.  I regularly bake or "poach" fish filets but never have cooked, prepared, deboned, or skinned a whole fish.  I began looking for a whole fish.... after many attempts and trips to grocery stores, I could not find the fish with the eyes/heads like I remembered.  Again, the curse of living away from the ocean.  This recipe called for 1 (1 lb) whole round fish.  This includes Snapper, rockfish, or sea bass.  I went to the meat counter (not sure where to find fishmonger in this area) and asked for these fish.  After the third attempt, they had one rockfish filet available.  Oh well, my dream of a fish with a head must wait for another time.  

I started by chopping garlic and shallots.
Here is my rockfish fillet.  I took the fillet and cross hatched it on both sides and seasoned with salt and pepper.  In the recipe, it says to do this to the skin but of course there is no skin here.  :(


I then rubbed the garlic and shallots into the cross hatched holes and the fillet itself and placed it into a foil pouch.

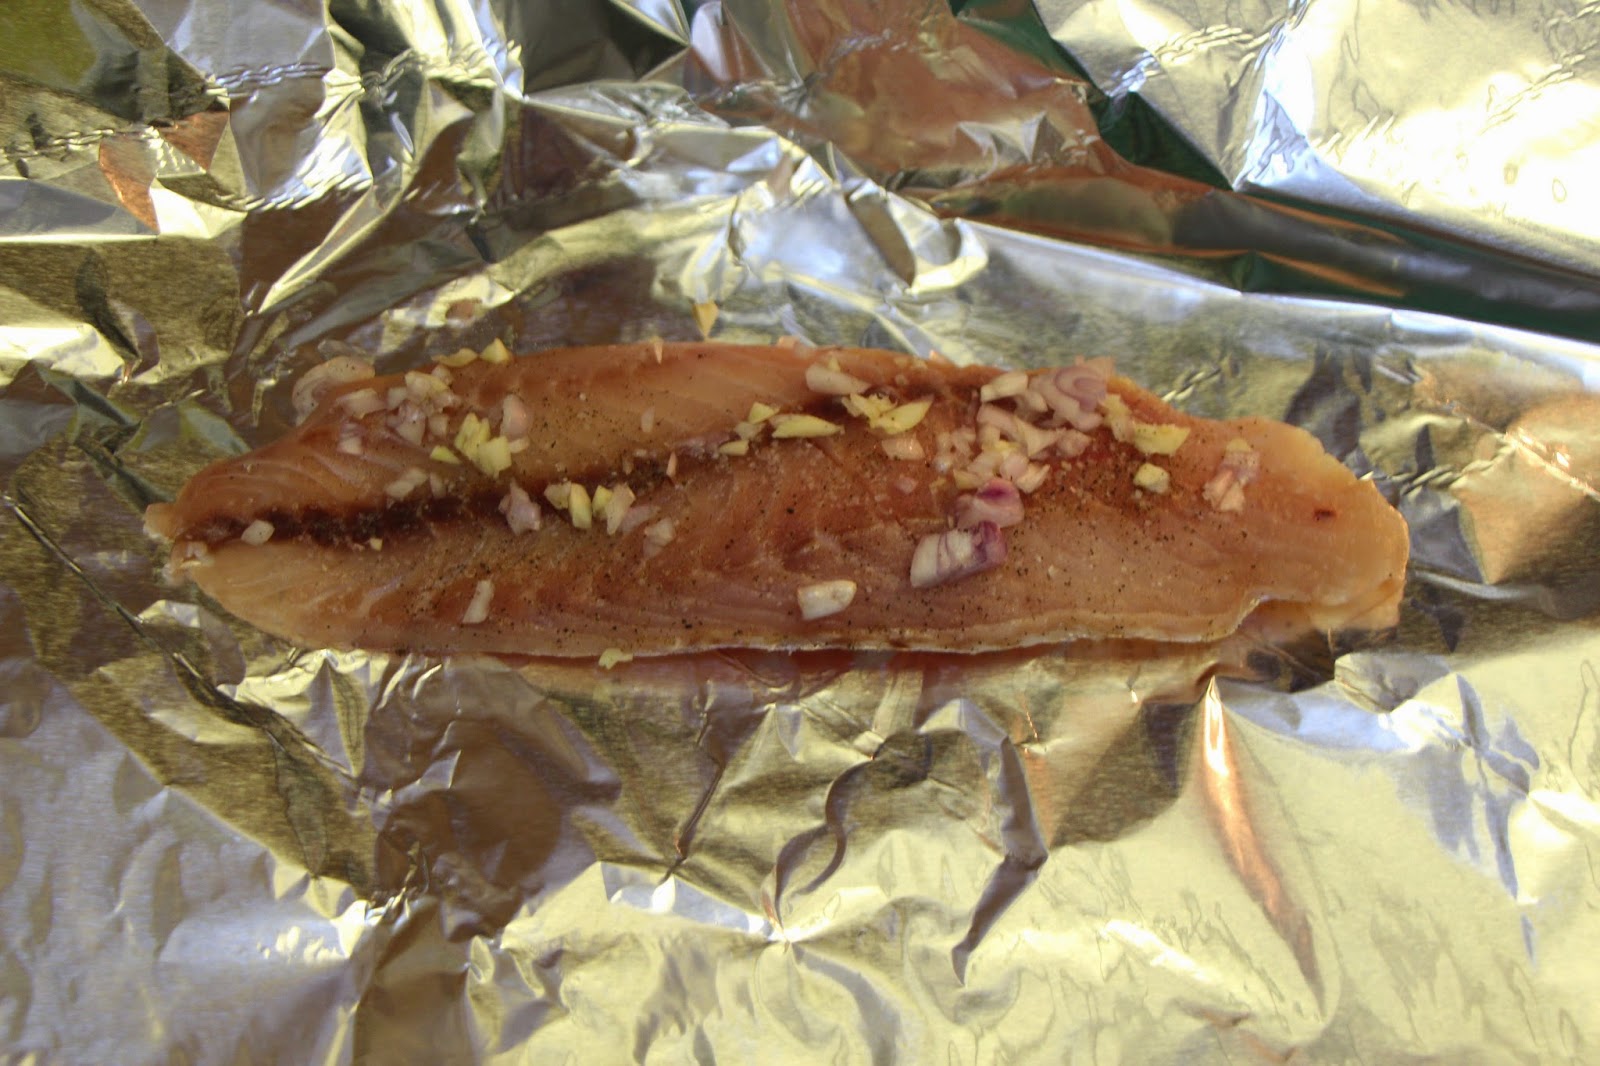
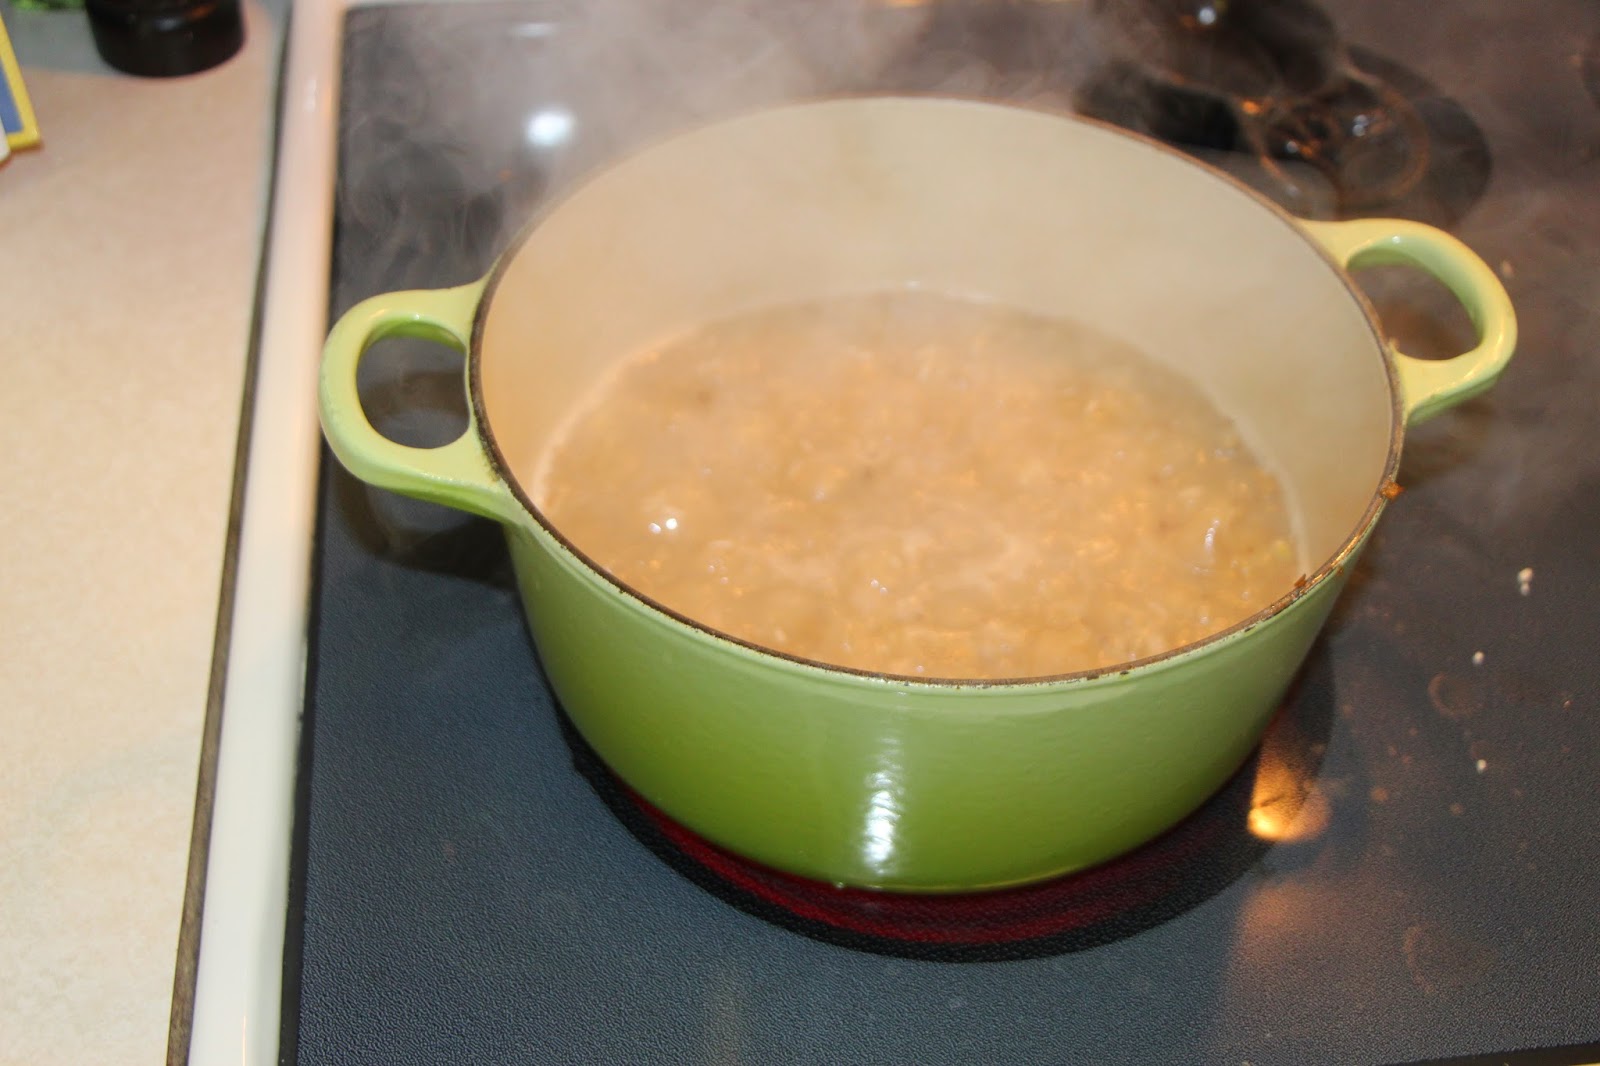
I topped it with a tarragon vinegar and wrapped it up.  I warmed up about 1-2 inches of water to a boil in my stock pot and then placed the package on top of it.  I then put the top on the pot and "steamed" it. Alton Brown talks about 3 different rigs to create the application of steaming.  The first is to take two plates with the bottoms touching each other and place the fish on the top one.  Then place this 2 plate tower into the pot of water.  My plates were to big for this rig.  The 2nd suggestions was to use a colander or steam basket and place the fish on that and then into the pot of boiling water.  I had the same problem here as well so I went for the foil rig.


After steaming for 10 minutes.

Here is the fish.  I am going to be honest.  It was not that great of smelling.  It was very strong tarragon smelling and sort of fishy.  I had bought the fish that day so I knew the fish was good.  Or at least trusting Frys grocery store for that.

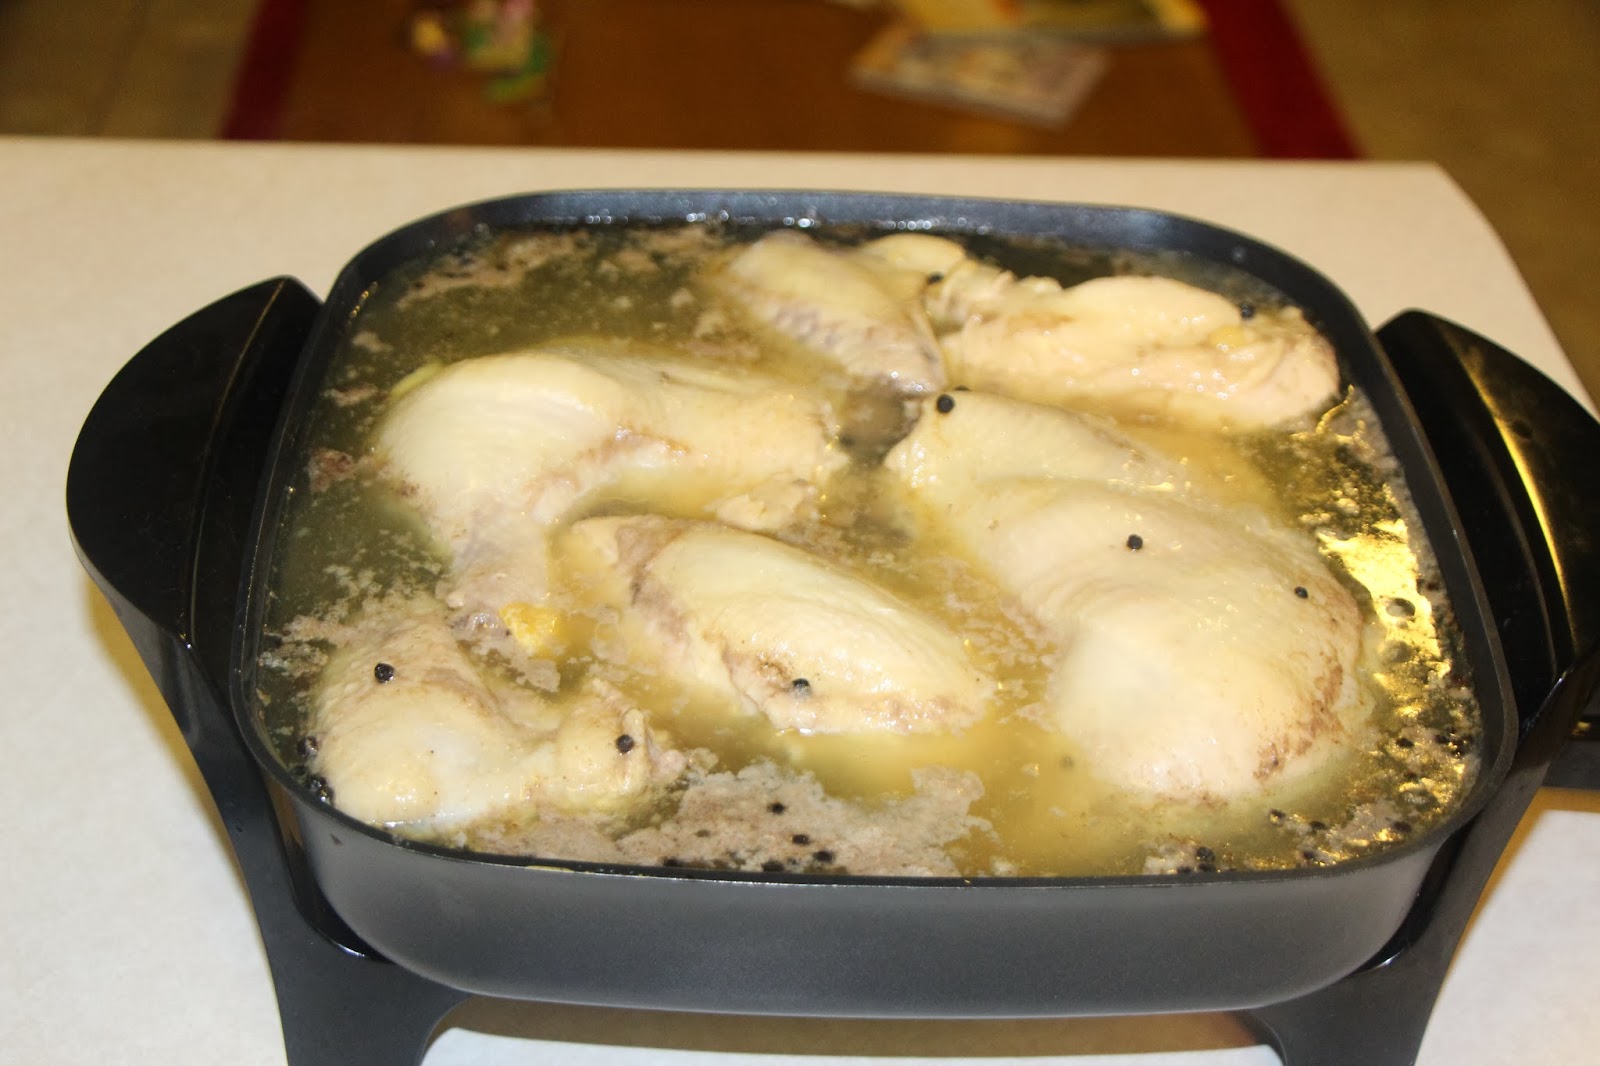
After removing the fish, I put the juices or "jus" inside the foil package into a small sauce pan with hot oil.  I added more shallots and garlic and then at the very end I added chile flakes and basil chiffonade.  This would become the topping for the fish.


I only left the oil, pepper flakes and basil for about 45 seconds.


Here is the finished product.  The fish had a very strong flavor and it was very oily from the sauce that I poured on top.  My family was all very kind and ate it(of course not Reagan) but it did not taste good.  It was a epic fail.


Overall, I think it was not the fish that was the problem but the flavoring.  The shallots were very strong and too much oil in the jus sauce on top.  I will stick to poaching, frying, or baking my fish like my mom taught me.  I do miss the ocean and the smell of fresh fish.  I still have a hard time buying "fresh" fish at the store in Arizona.  Am I the only one?  I will stick to frozen fish fillets and shrimp unless I am near the ocean.  Maybe I was spoiled as a kid or during my recent visit to Alaska but it is just not the same.  Arizona peeps?  How do you cook your fish?  Where do you get your fish from?

Sunday, July 20, 2014

Sugar Snap Pea Snack


Sugar Snap Pea Snack

I am now an adult, which means I am suppose to like veggies right?  I tell myself I like veggies and have tried to set a good example for my little ones.  In fact, at the age of 21 I pretty much rarely ate vegetables.   It's not my parents fault.  I mean I lived in the lettuce capital of the world for goodness sake.  I just don't CRAVE vegetables.  Because of that, I have not felt good for the first 1/2 of my life with regards to food.  Once I got married and was in love and such, my belly liked carbs, sugar and cheese....oh so much cheese and my body showed it.  Then I tried to have a baby.  Guess what, when you are overweight it is harder to have a baby.  To make this story short (and at this point I am not sure why I am even sharing this information) it took some $$$$ to make Ryan happen.  Once I got pregnant, I suddenly cared about what my body was made with.  I was staying at home watching food network ALL DAY LONG.  Ok so I watched all the pregnancy shows too but mostly the food network.  This is when my love of food and cooking started.  Alton Brown was my favorite and hence the beginning of this blog.  I started learning how to cook veggies in different ways.  I was pretty much grew up to eating salad and boiled vegetables. Again, not bashing my mom.  It is just the way it was.  I didn't realized that hiding and mixing vegetables in the things I usually eat like rice and pasta made them more palatable.  Ok that was a major tangent but the point is, vegetables gets a bad rap.  Yes, it can be bitter and it is still not the first thing I grab when I am hungry but I am not afraid to try them.  This application to sugar snap peas is a great way to start.  Who doesn't like to dip their food.  This is a basic blanched sugar snap pea with a great dipping sauce.  This is a recipe that people, even my brother who does NOT eat vegetables, to good way to start incorporating them into you diet.  THIS MEANS YOU JASON.  I started with the dressing/dipping sauce. 


The ingredients include sour cream, mayo, lemon juice, lemon zest, tarragon and red pepper flakes. I am pretty sure everyone knows that I hate mayo.  It is sooooo gross. It basically looks like puss or mucous of some sort.  Anyways, in the name of science I put them all in a bowl and whisked the ingredients together.  Again, I like veggies but do not go for them first but this dipping sauce was awesome!!  The fresh lemon zest and lemon juice made it pop in my mouth.  I placed it into the fridge and moved on to the peas.


Hence the name sugar snap peas, these are firm peas that you eat the shell and has a sweet flavor.  Sweet yes, but it is not like eating sugar.  Just so you know.  Don't be fooled by the name.  That does not mean it is not good.  Just FYI. Some people eat these raw including me.  My kiddos will eat them if I force them but this is the first time I blanched them.
 Blanching again is placing the peas in boiling water for 2-4 minutes and then drained and quickly placed into an ice bath.  These peas turned a vibrate green color.  You eat with your eyes before your mouth and I was excited to try this.  I placed them on a paper towel to dry.


The point of letting the peas dry was so that the dipping sauce does not slide off.  Do not forget this step.  I was so excited to try it that I attempted to dip one and the dressing fell right off and onto the floor.
 Once the peas were dry, I added it to the plate with a piece of chicken and red mash potatoes.

I was pleasantly surprised with the taste.  The dip was flavorfully and light despite the mucous, I mean mayo in the dip.  I even ended up putting the dip on the chicken.  Overall it was great.  More so than the dip, I was surprised by how much more I enjoyed the sugar snap peas once blanched.  It took ALL of the bitterness away.  I could have eaten a huge bowl of just that.  I am planning on doing this to all my sugar snap peas from now on.  I am sure my kids will be more likely to eat it in their lunch boxes if I do this.  The snap peas are in season so get yourself some and try this.  You will be pleasantly surprised.

Monday, April 28, 2014

Breaking my schedule for Brittle

Breaking my Schedule for Brittle

We are still working with water and in this case we are boiling.  Brittle is usually a yummy treat that you can find around the holidays.  There is a certain someone  (M.E.) who makes an AMAZING peanut brittle and will not share the recipe.  My mom loves this peanut brittle and we wish we could re-create it.  I was excited to try this and see what all the hype was all about.  I have never made brittle but according to my mom it is pretty easy.  My grandma even makes it quite often.  This does not have peanuts in them but pumpkin seeds.  I honestly have never had pumpkin seeds and wasn't even sure where to find it.  The kiddos and I went to Fry's and looked in the section where you can chose the amount of product and package it yourself? What is that thing called anyways?  There were those green seeds.  Back to the house we went with the green pumpkin seeds.  They sat in my pantry for a couple of days and then I finally decided at 1:20pm on Friday that I would whip this up for an after school snack.  I started with 2 cups of pumpkin seeds.


I placed 1 tbsp of oil into a medium size pan and then toasted the seeds by constantly stirring.  I did not leave the stove because I was so afraid to burn them.

After the seeds were lightly brown and I could smell them, I removed the seed and covered them with cayenne pepper, cinnamon, salt.
Next is the sugar mixture.  The recipe stated to use 3 cups of sugar and added it to the water and bring to a boil.  Anyone forgetting something????  How much water????  I quickly looked up online this exact recipe and its said something like 12 oz of water.  What did we ever do without high speed internet.  Or any internet for that matter.  Ok, quickly did the math and added 1 1/2 cups of water.  Stirred until the sugar was dissolved.
Then I brought it to a boil, covered it for 5 minutes and then took the lid off.  It then said to leave it alone for another 5 minutes.
At this point, you basically continue to let it boil on medium heat until the liquid becomes an amber color.
In the book it says 15-20 minutes.  I look up at the clock and notice I have 20 minutes until I need to pick up Ry from school.  Ok, I can do it......  20 minutes later, it looked like this.
Not as AMBER as I was hoping but I couldn't wait any longer so I quickly pulled it from the heat, added the seeds and poured it onto a sheet pan lined with a sill pad and off I ran to the car to get Ryan.
When I got home it looked like this.
I took a taste.  :(  Lets just say that it was NOT the amber color apparently.  The flavor was ok and I enjoyed the slight heat that came from the cayenne pepper but the sugar portion was gritty tasting.  Either I didn't let it get amber enough or I didn't let the sugar dissolve all the way?  Either way, we all had one piece and the rest went into the garbage.  :(


I most definitely will try this again.  Hoping to do it when I don't have to go pick up my kids mid cooking time.  I might even have to go ask my grandma for some advice.  Either way, this was not good eats because of lack of patience and poor planning.  I will keep you posted if I try it again. 

Tuesday, April 1, 2014

Rice

Rice Kicked Up A Notch

Rice is one of those staples in a house that most everyone has.  Brown/White/Long or Short Grain, there are millions of different types of rice that can be used for just about anything.   Rice is one of the most versatile bases for anything.  I mostly use it to bulk up my leftover meats and veggies.  Always good if you add it into a burrito or as a side dish.  I was surprised to think that I needed to review how to make rice.  Don't we all just follow the directions on the back of the bag or box?  Or even better, use a rice cooker?  I have even been so lazy as to make the 90 second rice in the microwave.  Not any more!  After looking at the price per pound as well as all the "extra" ingredients, its just a smarter, healthier and economical way to have rice in our diet.  I decided that this could make life a little more interesting.  The best part of this was again, I didn't have to stand next to the stove and stir the rice or wait for it to boil over and then try to "simmer" to that "perfect" simmering temperature.  The oven comes to the rescue again.  I started out with 4 cups of liquid.  In my case I had about 2 1/2 cups of left over chicken stock (from the box of course) and then supplemented water for the rest.  Alton Brown suggests to warm it up to boiling in a kettle.  Unfortunately my kettle is in our camper and I wasn't about to drive to get it for this.  In the picture you can see the blue small sauce pot.  I am sure there is a "correct" name for it but have no idea right now.  I brought it to a boil and then turned it off.  Into the big green pot went 1/2 diced onion and 2 TBSP of minced garlic.  These are two staples in my house.  ALWAYS.  When I don't know what to make, I always start with that.  


Oh wait, before you put the "aromatics" into the pot, I added butter (2 TBPS) until it stopped foaming.  Hence the brown color in this pot prior to the onion and garlic.  I think I let it go a little to long but I kept going anyways.   Brown means flavor right?


Now into the pot went the onion and garlic.


Next, 2 cups of white rice.   As a side note, this recipe is called Pilaf.  Pilaf is the method of how this rice is made.  This is the first time I have ever made "pilaf" without a box.  I actually thought rice pilaf just meant that it had almonds or some type of nut in the recipe.  Shows how much I know.  After you have added the rice, the rice actually toasts and creates a nutty smell and flavor.  It actually smelt like toasted nuts at this point.


After the smell had been achieved, the liquid went in.  The sizzle sound happened.  At first I panicked because I thought for sure it would boil over but once I stirred the rice, the sound died down.


Next up is to place the top on the pot and place it into a 375 degree oven.  This is by far the best part of the recipe.  I can walk away and know that the rice will be perfect after 17-19 minutes.  Another side note, previously I have used a rice cooker.  I liked it, but most likely because I didn't know better.  Or it could have been because our rice cooker sucked.  Either way, at this point, this was soooo much easier and I didn't have to get out another tool for the kitchen. After the 18 minutes, I pulled it out to find this.  Yummy golden brown.  Of course this is NOT burnt.  Golden brown means flavor!!!  The golden brown you can see in this picture is the onions.


I serviced it with BBQ chicken and a Mexican veggie mix of corn, black beans, bell peppers and tomatoes.

As an FYI, after cooking rice you should never stir rice but use a fork to "fluff" the rice.  It helps to prevent the rice from clumping or sticking.


Overall even though it was a simple dish, I learned a lot.  Just plain rice is boring!  Adding a simple onion and garlic and change both the texture and flavor of the rice without the extra calories.  The other amazing thing is that it is versatile.  Mexican, Italian, or Asian flavors can all be bulked up with a side of rice or mixing it together.

Thursday, March 27, 2014

Are we in the South?

Are we in the South?

I will be honest and say that I was not that excited about this recipe.  Collard greens are something I did not grow up eating.  To be honest, this might be the first or second time I made these.  To me, the name sounds gross.  Sort of like sour cream.  I never would eat it because the name sour cream did not sound appetizing.  Once I ate sour cream, I fell in love.  I sure hoped it would be the case with collard greens because this vegetable is sooooo good for you.

Collard greens is a super food.  Very high in fiber, Vitamin C and K.  Vitamin K is something to watch if you are on any blood thinners.  Just a discloser that it can make your blood thicker.  I don't need anyone having a stroke and blaming it on me because I said collard greens are a super food. Probably the best thing about collard greens is that it is only 49 calories a cup.  Eat it up!!!

I started by getting two bunches/lbs of collard greens, cutting them up and washing them in the sink.  


I then placed two smoked ham hocks in the pot with 3 cups of water.  Ham hocks.... These freaked me out.  What are they exactly?  Are they pigs feet?  I had to go to google to get the scoop. Honestly, what did we do if we needed an answer before the internet.  LOL.  The definition is as followed:

ham hock (or hough) is the joint between the tibia/fibula and the metatarsals of the foot, where the foot was attached to the hog's leg.

Now that we know it came from an animal, which for some reason is grossing me out more and more,  why do we need it in the recipe.  Basically it is made of bone and cartilage.  Because of this, it needs a long time to break down.  In this recipe it is used for flavor.  I also added a mixture of red wine vinegar and balsamic vinegar again for flavor.

After that, I placed it into a pot with the top on and into the oven at 250 degrees.  I cooked the pot for 2-3 hours, attempting to "simmer" the collard greens again.  After 3 hours, I placed all the ingredients into a smaller pot and then placed it back into the oven for another 2-3 hours.  The house definitely was getting smelly from the collard greens.  

After 2-3 hours an amazing set of friends called and said, "come over and have dinner".  I was so glad but knew I had to eat this because I didn't want to waste it or have to make it again.  I took the pot out of the oven and opened the top and here is what I saw: 

Well.... what to say?  I was not looking forward to this.  It was a brownish green and the smell intensified when I opened it.  I took a deep breath, put the top back on and put it into the car.  I headed to our friends house and was praying that they would not be grossed out.  These two particular people are AMAZING and are always willing to try it.  I was hoping for no judgement. 

The VERDIT:  The ham hocks were gross and slimy.  We debated if we were suppose to eat it but opted to remove it and throw it away.... in the trash outside.  LOL  We sat down to a nice dinner with a table cloth, real plates and no kids around!  (Thank god for the iPad and Frozen being released that day)  We each took a portion making our comments which shall remain private because they were probably not appropriate and took a bite.  The verdict was that it was edible and even one person took seconds.  :)  The rest went into the trash.  I was not a big fan.  The texture was limp and sort of slimy in my opinion.  To me, I could never get the smell out of my nose and the idea of the ham hocks.  I would not make it again.  Maybe I cooked it too long or maybe I needed to serve it with something else.  Any suggestions?  I would like to force myself to eat it but  it has to be better than this.  Please help???


Friday, March 21, 2014

Dried Beans Experiment

Dried Beans Experiment

Water can be a very powerful thing.  It can knock you over in the ocean, it can flood a city, it can help to feed and grow plants, and it can even made or break a meal.  In this next section of "water" we learn about simmering.  Anyone who has ever attempted to cook, even a boxed meal has read the word simmer in the directions.  Have you ever wondering what it actually meant?  I thought it was heating something up until it started to make that, "its too hot and you better turn the heat down" sound.  Usually it includes the sound, "oh crap" which means that I walked away from the stove and my pot boiled over and then I had to run, move the pan and then turn the heat down.  Can anyone relate?  

Simmering basically means to bring water and some target food to the narrow range of 175-200 degrees.  LOL.  Who measures this temperature?  Not me.  Only if I am making some sort of candy or a raw meat product.  This basically means until there are tiny bubbles that form at the bottom of the pan and then travel to the surface.  Anyone see a couple of problems with this?  First of call, my electric stove in notorious for not being able to "slowly" do anything.  It is either boiling over of not hot enough.  Ok, so I like to blame things on my stove instead of my impatience.  Second problem that I see is that how are you suppose to see these infamous bubbles with things besides water in the pot or when the pot is covered.  Because of these two problems,  I rarely "simmer" anything.  I was bound to figure this out!  

The dried bean experience was a chance to figure this out.  I started with 1 lb of white navy beans.  Why navy beans?  They were on sale, only $1.09 for a pound and I love the navy bean song from Adam Sandler.  Thanks Symon.  I started by inspecting the beans for any discolored, cracked, or shriveled beans.  I then rinsed them.   The next step is the soak the beans.  I never understood this but it makes the beans cook faster.  LOL, it obviously doesn't take into account the soaking phase right?  I basically soaked them in the pan I was going to cook with in water for 5 hours.   This is where water can be powerful.  Not enough soaking time and the beans will take twice as long to cook; soak them too long and they get mushy and flavorless.  Not good eats.  I am going to be lucky to get my kids to eat them with flavor.  


After soaking, I rinsed the beans that have doubled in size by this point.  I seasoned them with salt which is VERY important while cooking with water.  If you don't know why, go look up osmosis baby!  I placed the beans and 4 cups of chicken stock in the pot over medium/high heat and bring to a boil.  (I got the boil down).  In another pan I was suppose to heated oil, garlic, and rosemary for a few seconds until nice and brown and it releases it oils.  I skipped this step and just threw it all in the pot because I didn't have fresh garlic so I used garlic powder. I also didn't want to wash another pan.

 Into the pot with the beans went  2 TBSP of garlic powder, 2 sprigs of rosemary, 1/2 cup diced carrots, 3/4 diced onion, and 1/2 cup of diced celery.  Don't forget the pepper.

 The best part of this recipe is that I do not have to stand by the stove.  After adding all of these ingredient, I placed the top on the pot and placed it into the oven at 250 degrees for 1 1/2 hours.  This is the best way to simmer ever!!!!

Once the time is over, I added a little more salt and pepper and then served with fresh bread. I had some diced ham left over from a previous meal and then added it into the "soup" to bribe my kids with "bacon" so they would eat it!


Symon, Ryan, and I loved it!  Ryan is learning about pioneers in school so we talked about beans and how "practical" they are to eat as well as cheap and full of protein and fiber.  They are perfect to use leftover food at the end of the week. I think dried beans is a great staple in the pantry.  I can imagine the pioneers making this sort of stew or soup over a fire in their cast iron dutch oven.  Of course Reagan did not appreciate it and ended up having yogurt for dinner.  Can't please them all.


Sunday, January 26, 2014

Poaching 101

We have arrived at the 5th chapter of Alton Brown's, " I'm just here for the Food".  This chapter is called boiling.  I think it is ironic that people who say they, "can't cook" say they can't even boil water.  So let's look at what boiling water is.  First, AB goes into great detail about how important water is to cooking and how there are many different "varieties of water."  Tap, bottled, filtered, sparkling, and spring water.  These all have slightly different qualities and therefore should be used differently.  There are many things you can do that are concidered boiling.  In this application we will be poaching.  Poaching is defined as cooking food GENTLY in liquid that has been heated until the surface just begins to quiver. Quiver is very scientific term don't you think?  AB calls that the temperature between 180-185 degrees. He also says that the best things to poach are fish, eggs, and chicken breast.  Now, the first thing I usually worry about when cooking eggs and chicken is, if I cook it slow, how do I know if is going to be cooked and if the surface bacteria will be killed.  This is solved by starting the liquid at a boil and then dropping to the desired temperature.  This ensures that the bacteria is killed and the food is not overcooked.  AB gives two ways to poach a chicken in the first application.  

#1:  Using a heavy bottom pot and fill it with white wine, black peppercorns, coriander seeds, and dried thyme. 


The whole bottle of wine and spices went into the pot.  They whole broiler chicken then goes in.  Don't forget to remove the "parts" inside the cavity and rinse the chicken.  Then fill the rest of the pot with water (I used tap) until the whole chicken is covered. 
Put the pot onto the stove and turn to a boil.  I then placed the probe into the thickest part of the breast.  With my probe it also measures the outside of the probe which would correlate to the water temperature.   The process took about 2-2 1/2 hours.  It made the house smell amazing with the white wine.  This mama loves wine so I was happy.


After the chicken reached the 180 degrees, I removed the whole chicken and let it drain.


At this point I removed the skin and picked/carved the chicken.  The chicken was easy to carve if you know how to do it.   I have done it about 100 times so I feel very comfortable with this, but it can be a daunting task.
I got an abundant amount of chicken that was moist and juicy.  You could definitely taste the seasoning including the white wine.  Yummy!

You are then left with the juices and bones that was left over.  This would be great for chicken stock.  I did not do it because... well I have two kids who were already whining about dinner.  Maybe someday, but not today.

This chicken was served with rice and roasted summer squash.  It was yummy.


#2 Method: This is also poaching chicken, but using an electric skillet.  I placed the wine and black peppercorns along with a bay leaf into the skillet.  


For this method, the chicken is cut into parts before the cooking.  I found this more difficult.  I was worried about raw chicken flying throughout my kitchen. 

I then placed the chicken breasts, thighs, and wings into the skillet and placed water in the skillet until the chicken is covered.  I want to note that I left the skin on.
This method was a lot easier for me, because I didn't have to sit by the stove the whole time.  I set the skillet to 185 degrees and then place the probe into the thigh and set it for 185 degrees.
After about 2 hours I removed the chicken and was again left with the leftover liquid.  I was more apt to use this liquid because there wasn't any bones and ligaments left in the liquid, but again I didn't save it because I was just cooking this chicken to use in a later time.
Here is the chicken.  I let the chicken cool and then removed the chicken off the bone.  I placed this chicken into a storage container and ate the chicken all week.  We made chicken salad, chicken enchiladas, and chicken stir fry.  It was nice to have chicken already cooked.
I liked both of these methods for chicken for different reasons.  All in all, what a great way to prep for the week.  Make one whole chicken and eat chicken 2-3 times during the week or make freezer meals.  The chicken was WAY better than boiling the chicken and not watching it.  Poaching is the way to go.  Try it out!